Manager Panel
The Manager Panel is the administrative hub of Voki, where Owners, Managers, and Supervisors monitor the entire video customer service operation in real time. Access is available through the sidebar menu after logging in, and all features are organized in intuitive sections.
Who can access?
Access to the panel's features depends on the user's role. See the table below to understand what each role allows.
Role Hierarchy
| Role | Access |
|---|---|
| Owner | Full access, including plan settings, billing, and branding |
| Manager | Full access to the management panel, reports, and settings |
| Supervisor | Access to reports, departments, links, monitoring, and call supervision |
| Attendant | Access only to the Workstation (cannot view the Manager Panel) |
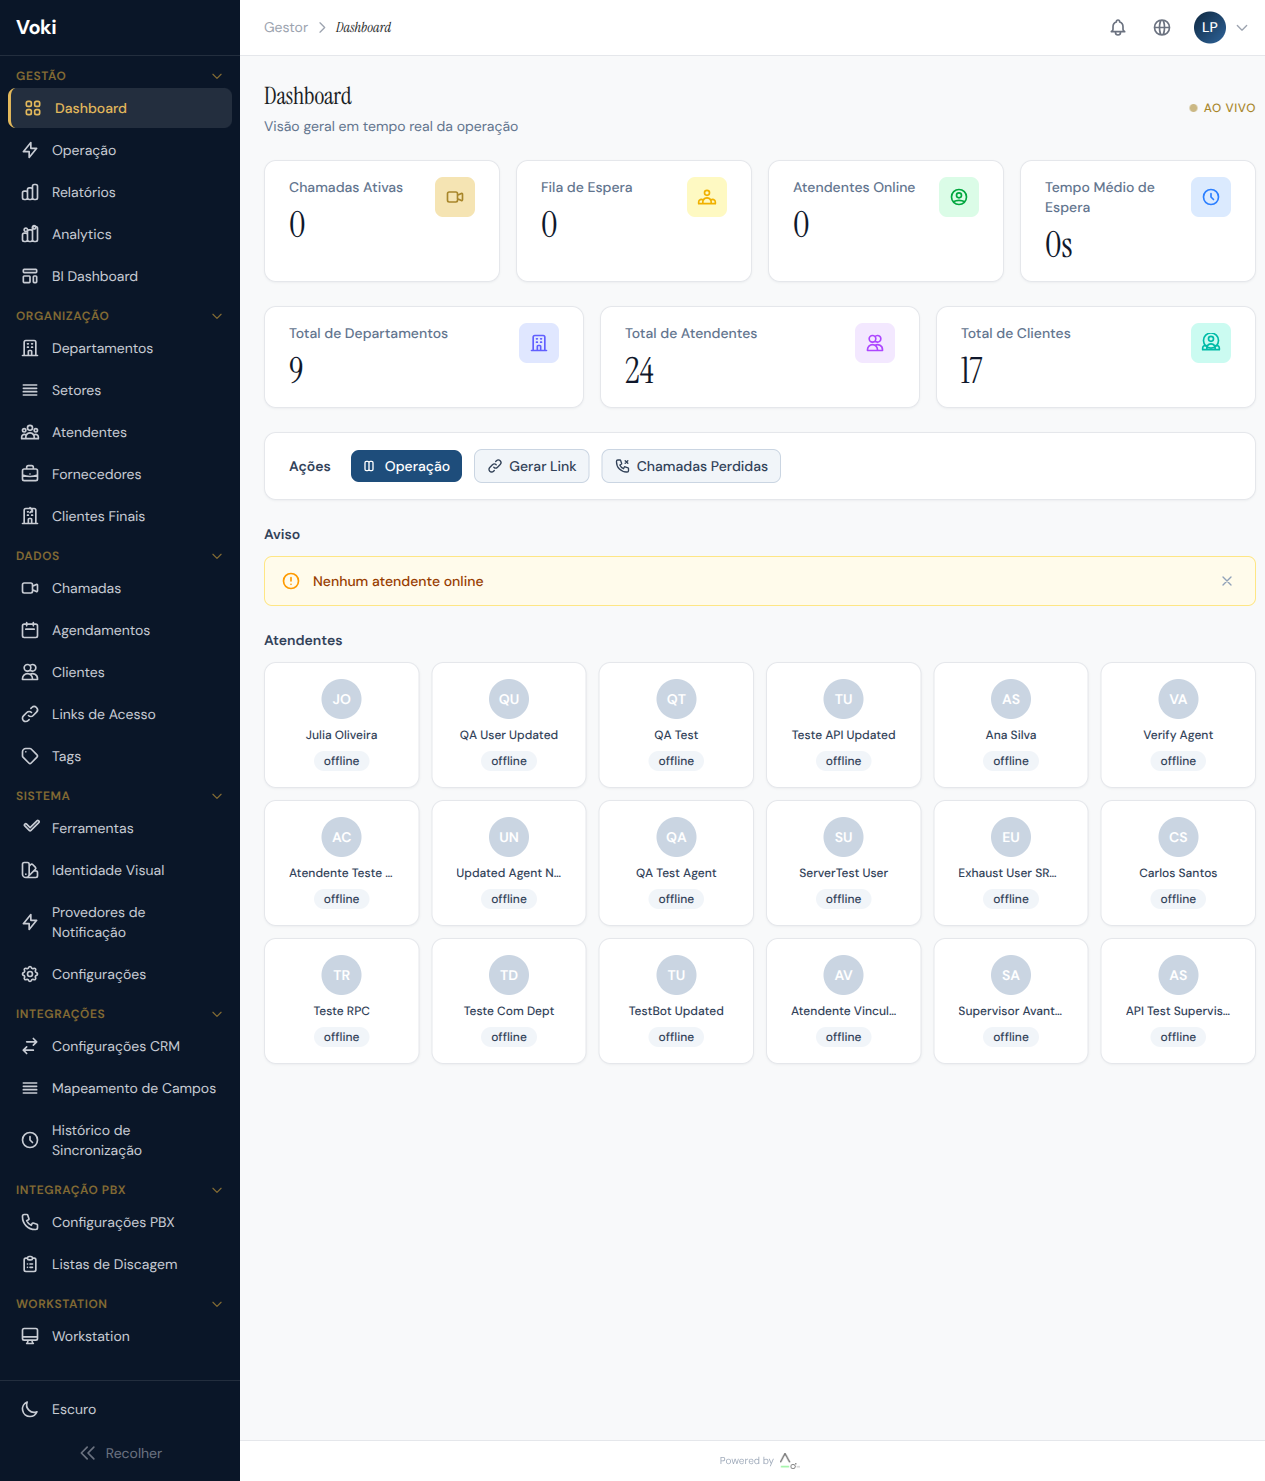
Dashboard
The Dashboard is the main screen of the management panel. It provides a consolidated, real-time view of the entire customer service operation, enabling managers to make quick and informed decisions.
When you access the Dashboard, you'll find the key performance indicators (KPIs) at the top of the page, followed by trend charts and the list of attendants with their respective statuses.
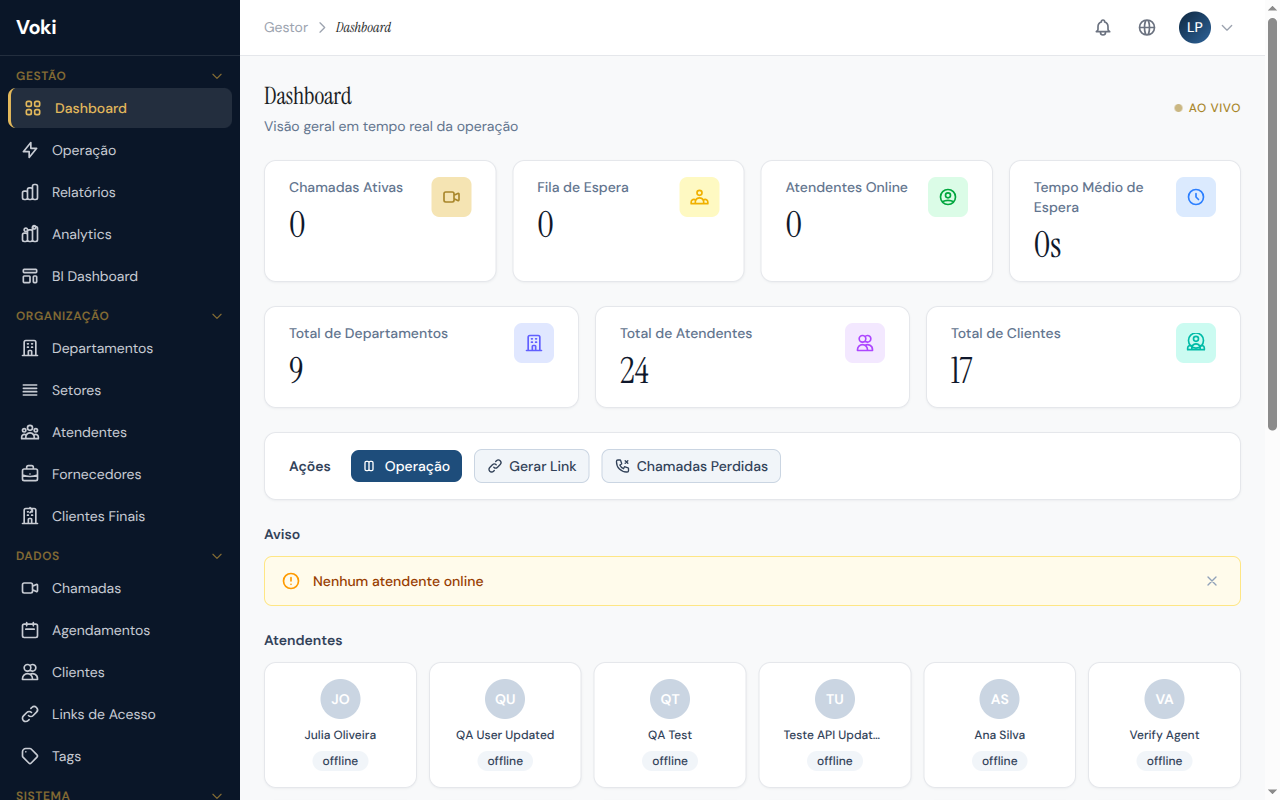
Real-Time Indicators (KPIs)
KPIs are updated automatically every few seconds, with no need to reload the page:
| Indicator | Description |
|---|---|
| Active Calls | Number of calls currently in progress |
| Online Attendants | Number of attendants connected and available |
| Clients in Queue | Number of clients waiting for service |
| Average Wait Time | Average time clients wait before being served |
| Abandonment Rate | Percentage of clients who leave the queue before being served |
Charts and Attendants
At the bottom of the Dashboard, you'll find hourly call volume charts and a table showing each attendant's real-time status.
Real-time data
All Dashboard data is updated automatically via WebSocket. You don't need to reload the page to see the latest information.
WebRTC Quality Indicators
The Dashboard also displays technical quality indicators for active video connections:
- Average latency — round-trip time for media packets
- Packet loss — percentage of media packets lost in transmission
- Resolution and bitrate — video quality being transmitted in each call
Quality alert
If average latency exceeds 200ms or packet loss is above 5%, call quality may be compromised. Check the attendant's or client's internet connection.
Operations
The Operations page provides a real-time view of the service operation, with live performance metrics and a detailed panel showing the status of each workstation. It is the ideal screen for supervisors who need to monitor day-to-day operations.
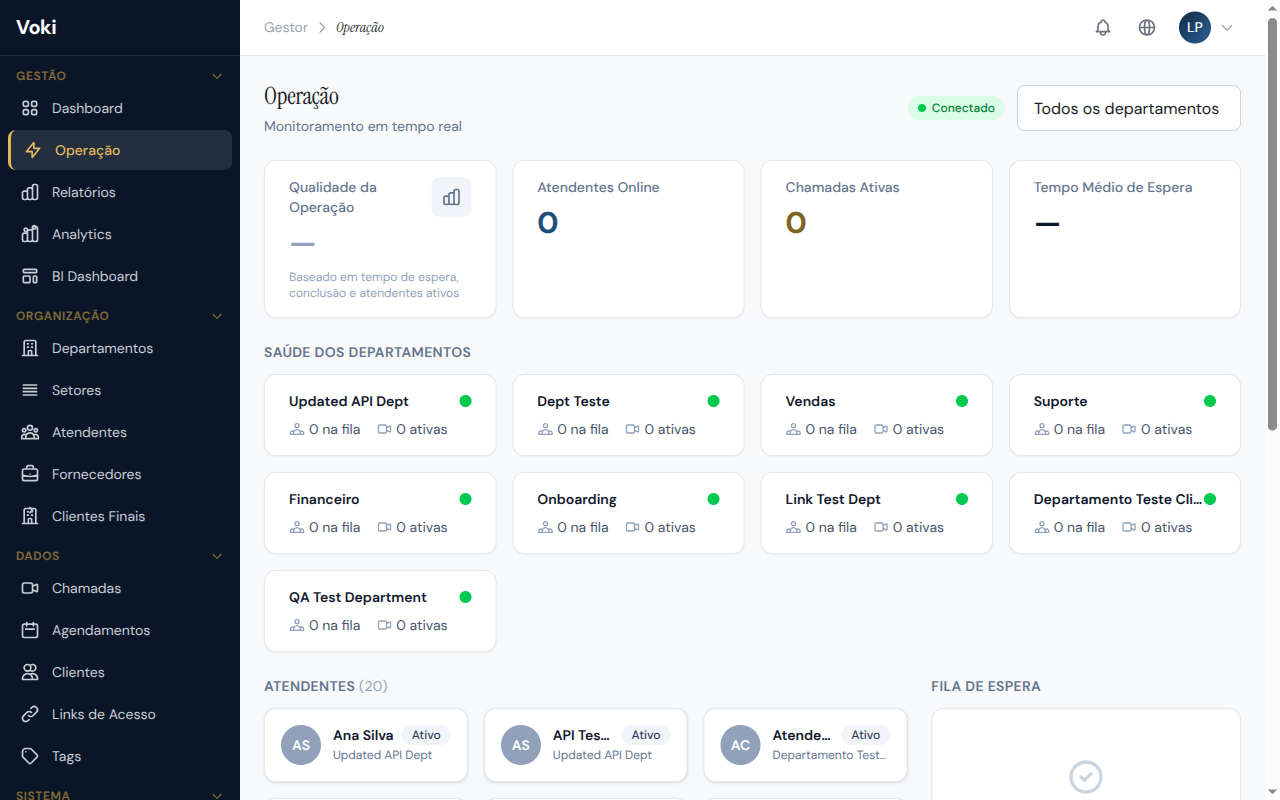
Live Metrics
| Metric | Description |
|---|---|
| Engagement Rate | Percentage of attendants actively on a call at the moment |
| Availability | Percentage of attendants with "online" status and available to receive calls |
| Call Volume | Number of calls received per hour and per minute |
| Average Handle Time (AHT) | Average duration of completed calls in the selected period |
Workstation Monitoring
Monitor each attendant's status in real time:
| Status | Description |
|---|---|
| Online | Attendant connected and available to receive calls |
| On Call | Attendant actively on a call with a client |
| Paused | Attendant connected but temporarily unavailable |
| Away | Attendant who has not responded to the heartbeat for more than 120 seconds |
| Offline | Attendant disconnected from the platform |
How does presence detection work?
The system sends heartbeats every 60 seconds. If an attendant does not respond for more than 120 seconds, they are automatically marked as "away," ensuring the presence list reflects the actual status of the operation.
Reports
The Reports page offers detailed historical analysis of service performance. Use the filters to segment data by period, attendant, department, and call status.
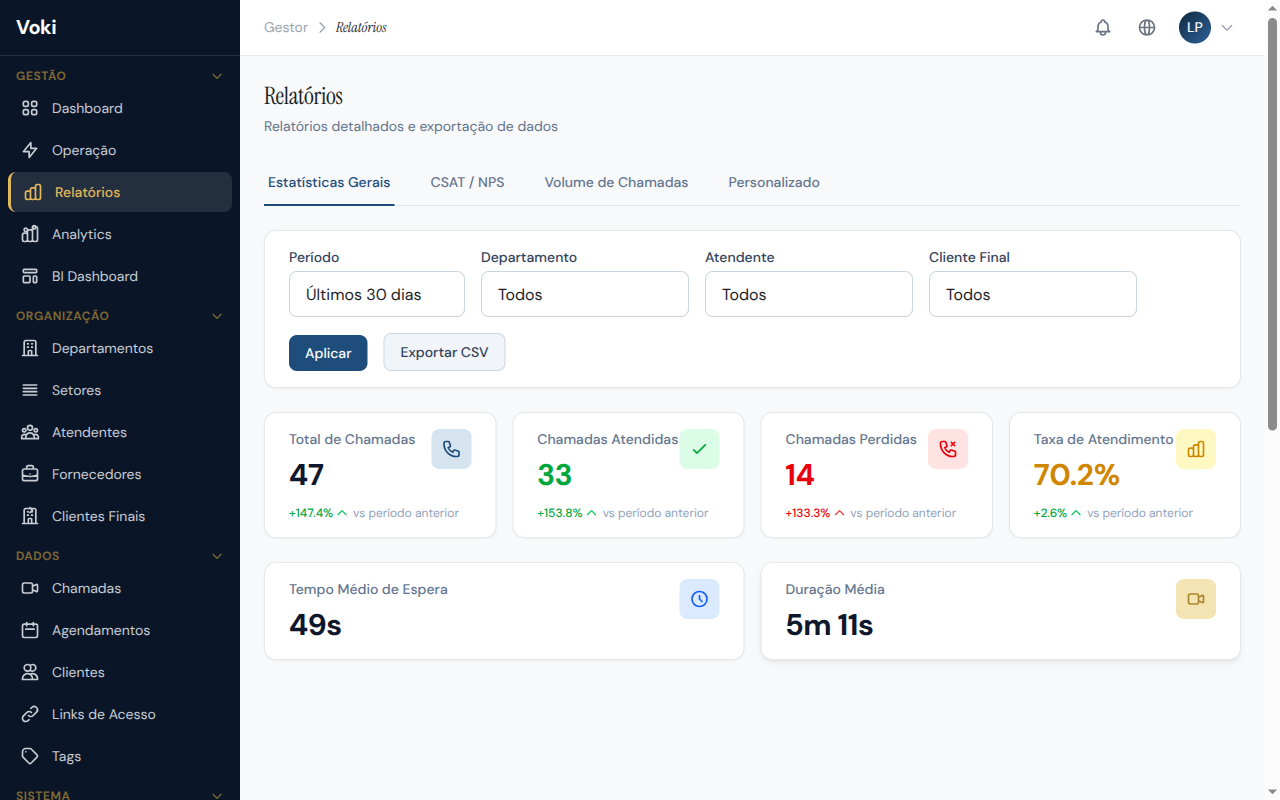
Available Metrics
- Average Call Duration — average time per call
- Customer Satisfaction (CSAT) — average satisfaction score (1 to 5 scale)
- NPS (Net Promoter Score) — promoters vs. detractors score (0 to 10 scale)
- Conversion Rate — percentage of calls that resulted in a business conversion
- Completed vs. Missed Calls — ratio of successfully completed calls to abandoned/missed ones
- Performance by Attendant — individual ranking with all the above metrics
How to Use Filters
- At the top of the page, select the desired period (start and end dates)
- Optionally, filter by attendant, department, or call status
- Charts and tables will update automatically as filters are applied
Default period
If no period is selected, the system displays data from the last 30 days.
Data Export
On plans that include CSV export functionality (Professional and Enterprise), you can export filtered data for external processing:
- Apply the desired filters
- Click the "Export CSV" button
- The file download will start automatically
Available export formats
- Calls: complete history with all fields
- Clients: client database with contact details and history
- Access Links: generated links with status and tracking
Analytics
The Analytics page presents advanced visualizations of service trends and patterns, allowing you to identify improvement opportunities and optimize the operation.
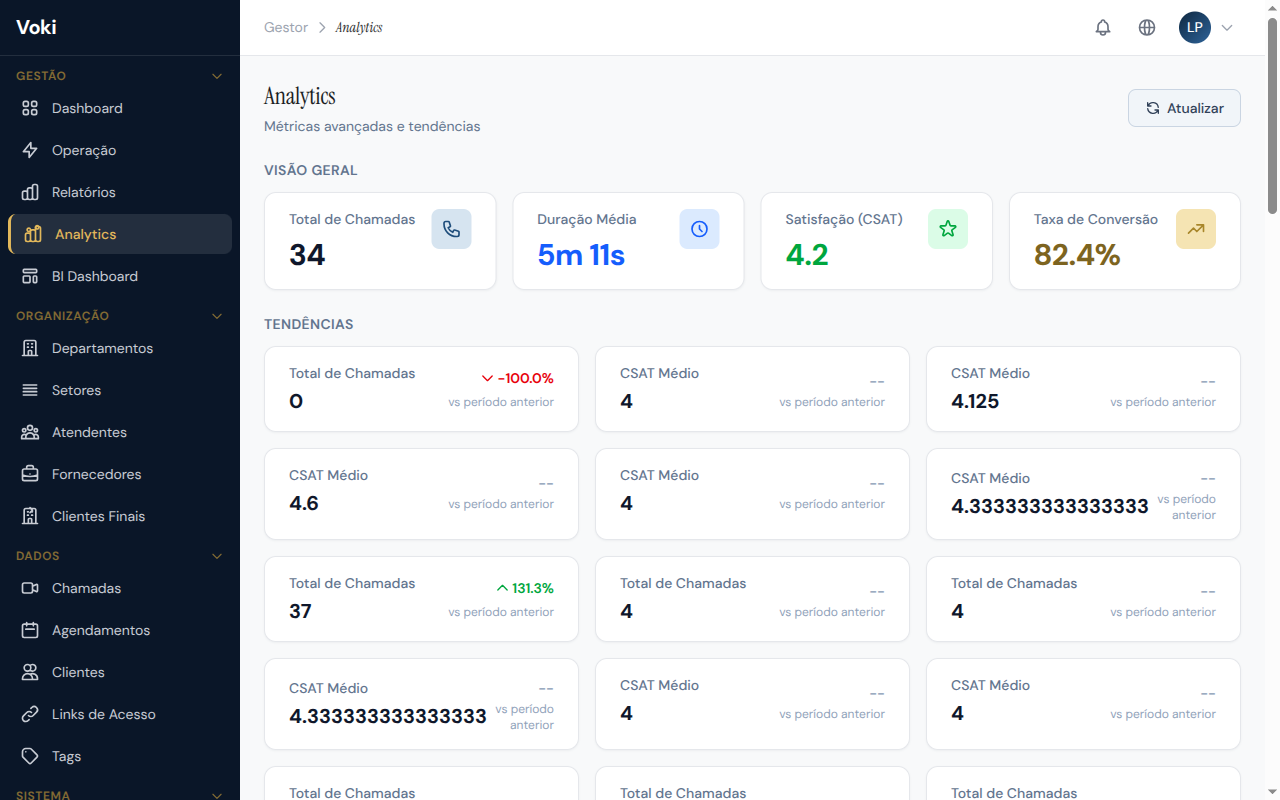
Hourly Trends
A chart showing call volume and wait time distributed by hour of the day, allowing you to identify:
- Peak hours — when demand is highest
- High abandonment periods — times when clients drop off more frequently
- Low demand windows — opportunities for training or breaks
Daily and Monthly Trends
Track the evolution over time of metrics such as:
- Total call volume
- First contact resolution rate
- Customer satisfaction (CSAT)
- Average handle time (AHT)
Performance by Attendant
Comparative table with individual metrics for each attendant:
| Metric | Description |
|---|---|
| Calls handled | Total calls completed by the attendant |
| Average handle time | Average duration per call |
| Average CSAT | Weighted average of customer satisfaction |
| Average NPS | Weighted average of Net Promoter Score |
| Conversion rate | Percentage of calls converted into business |
Weighted averages
Averages are calculated using weighted means, taking into account each attendant's call volume to avoid statistical distortions. Attendants with more calls carry greater weight in the calculation.
BI Dashboard
The BI Dashboard offers advanced business intelligence visualizations, consolidating data from multiple sources into interactive panels for strategic analysis.
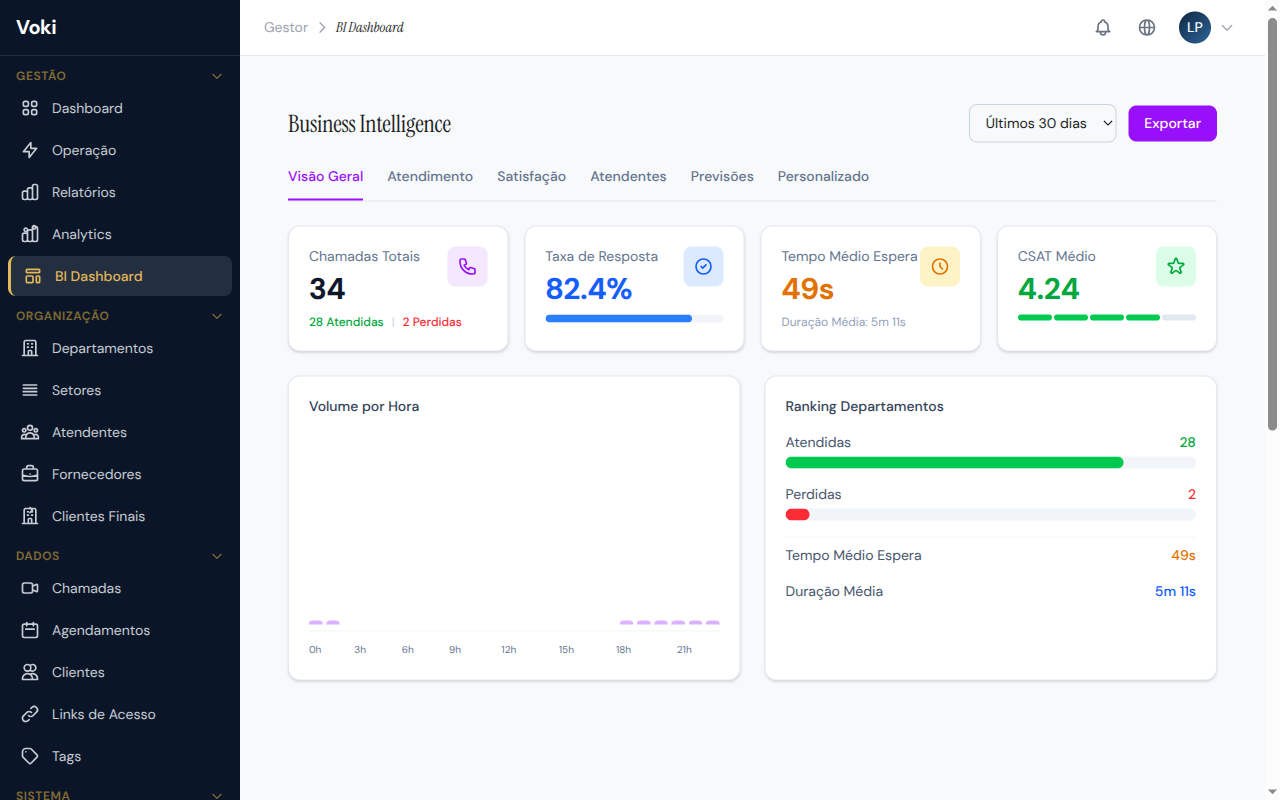
Features
- Comparative charts — compare periods, departments, and attendants side by side
- Heat maps — visualize time and volume patterns intuitively
- Trend analysis — identify seasonal and growth patterns
- Key indicators — consolidated KPIs with goals and visual alerts
Optimized performance
The BI Dashboard data is powered by materialized views that are automatically updated every 15 minutes, ensuring query performance without impacting the main database.
Departments
Departments are the organizational units of customer service. Each department has its own client queue, team of attendants, and specific settings. It is the central element for organizing service delivery in Voki.
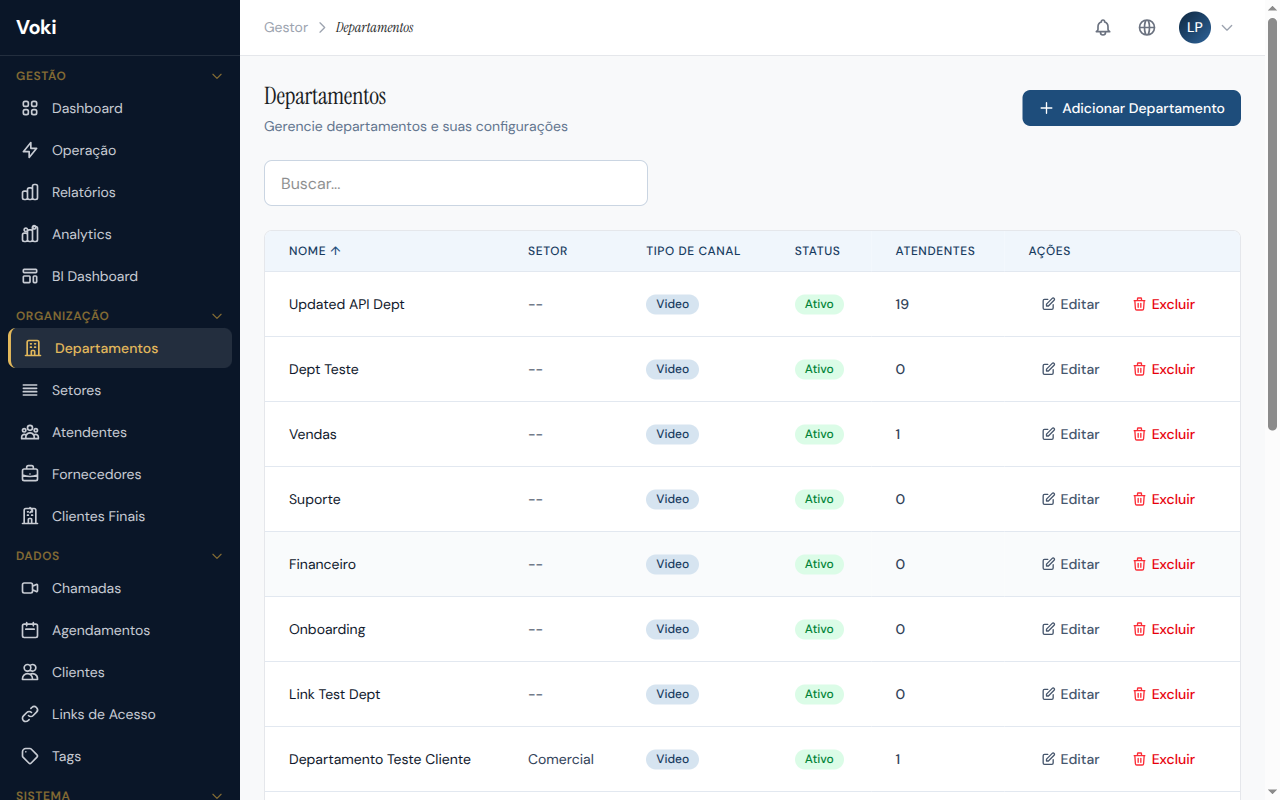
Create a Department
- In the sidebar menu, click "Departments"
- Click the "New Department" button
- Fill in the fields in the form that appears:
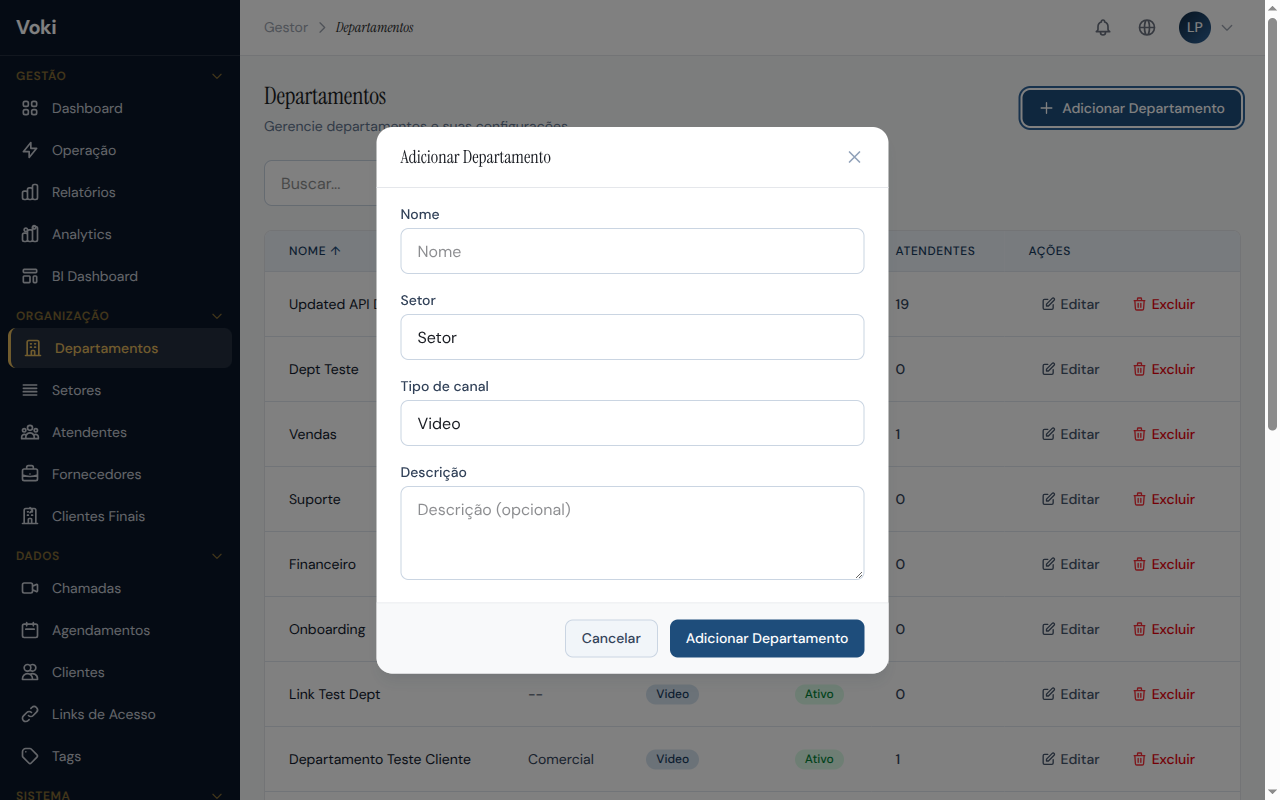
- Name — department name (e.g., "Technical Support," "Sales")
- Description — brief description of the department's function
- Logo — optional image for visual identification in the waiting room
- Click "Save"
Department limit
The maximum number of departments depends on your plan. When the limit is reached, the system will display an alert with options to contact the sales team for an upgrade.
Edit a Department
- In the department list, click on the department you want to edit
- On the editing page, you can modify:
- Basic data — name, description, and logo
- Queue settings — maximum size and wait time limit
- Enabled features — specific features for the department
- Recording policy — whether recording is optional or mandatory
- Default background — default virtual background for the department's calls
- Click "Save" to confirm the changes
Assign Attendants to a Department
- On the department editing page, go to the "Attendants" section
- Use the selector to add or remove attendants
- An attendant can belong to more than one department simultaneously
Call distribution
Attendants will only receive calls from the departments they are assigned to. Make sure each department has enough attendants for the demand.
Delete a Department
- Departments without call recordings can be deleted normally
- Departments with call recordings cannot be deleted due to audit and legal compliance requirements
Audit protection
Departments that have call recordings cannot be deleted. This restriction exists to ensure the integrity of the service history. If you no longer wish to use the department, you can deactivate it instead.
Sectors
Sectors allow you to organize departments into hierarchical groupings, making it easier to manage larger operations with many departments.
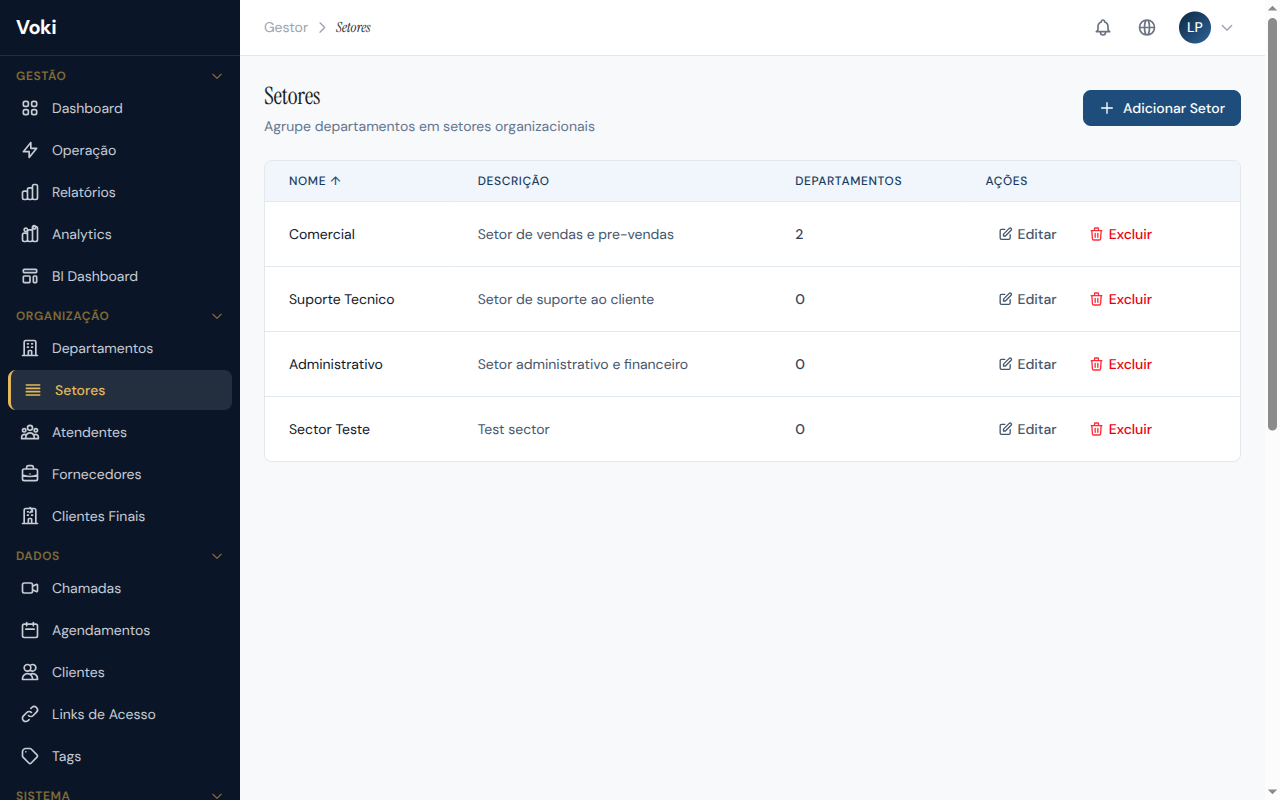
Features
- Create sectors — define logical groupings (e.g., "Sales," "Post-Sales")
- Hierarchy — sectors can contain sub-sectors
- Association — link departments to sectors for visual organization and in reports
Organization Example
Sector: Sales
  ├── Department: Individual Sales
  └── Department: Corporate Sales

Sector: Support
  ├── Department: Level 1 Support
  └── Department: Level 2 Support
When to use sectors?
Sectors are especially useful when the company has more than 5 departments and needs to organize them into categories for easier navigation and reporting.
Vendors
The Vendors feature allows you to register and manage third-party companies that provide service delivery for your operation. This is essential for companies that use external teams or BPOs (Business Process Outsourcing).
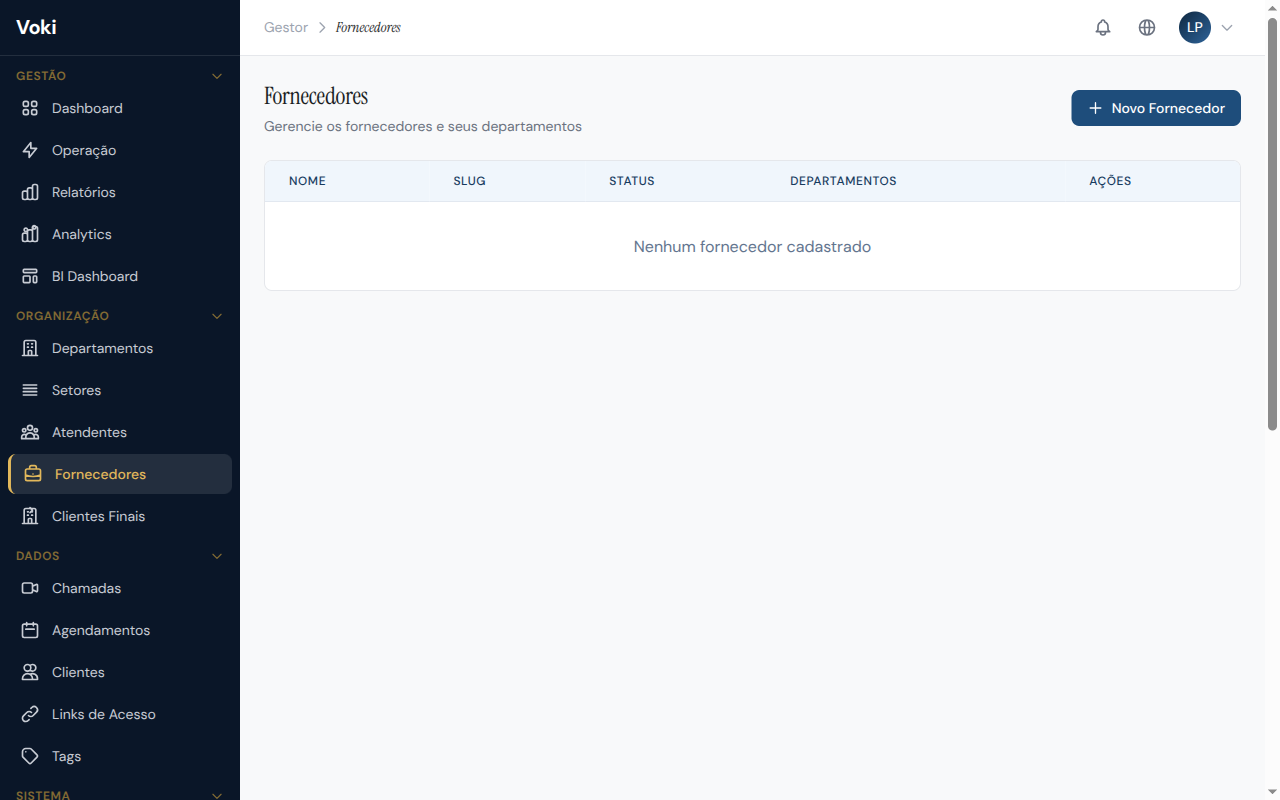
Register a Vendor
- In the sidebar menu, click "Vendors"
- Click the "New Vendor" button
- Fill in the required fields:
- Company Name — the vendor company's legal name
- Tax ID — company registration document
- Contact — responsible person's email and phone number
- Click "Save"
Assign Attendants to a Vendor
- On the vendor page, go to the "Attendants" section
- Select the attendants who belong to this vendor
- This association allows you to track in reports which calls were handled by outsourced teams
Management
- View the complete list of vendors and their linked attendants
- Edit registration information at any time
- Disassociate attendants when the vendor contract ends
Traceability
Associating attendants with vendors allows you to generate segmented reports comparing internal vs. outsourced teams, facilitating performance and cost analysis.
End Clients
The End Clients module allows you to manage the end clients served by your outsourced vendors. It complements the Vendors section by providing visibility into the complete service chain.
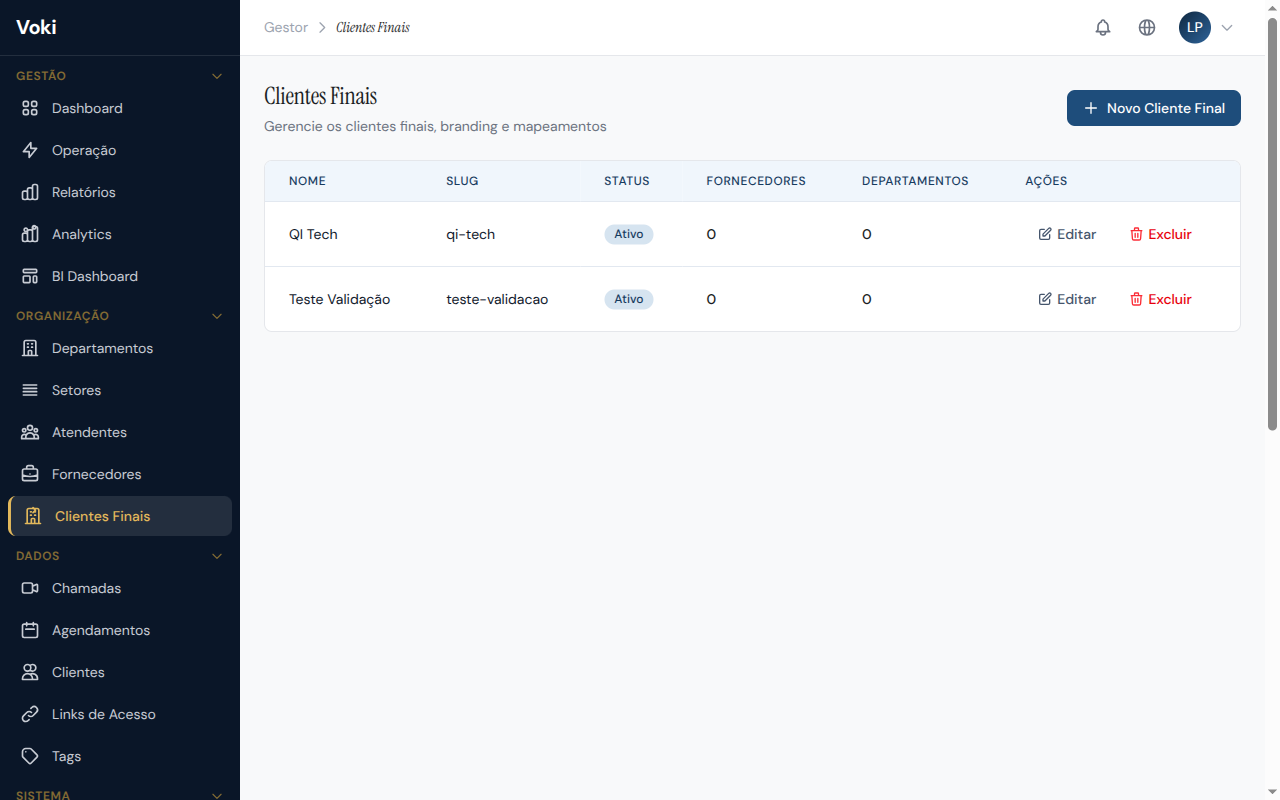
Features
- Registration — register your vendors' end clients
- Association — link end clients to their respective vendors
- Traceability — track the service history per end client
- Reports — view service metrics segmented by end client
Complete chain visibility
By combining Vendors + End Clients, you gain full visibility into outsourced operations: who delivers the service, who they serve, and at what quality level.
Attendants
In this section, you manage all platform users — attendants, supervisors, and managers. This is where you create accounts, define roles, and assign users to departments.
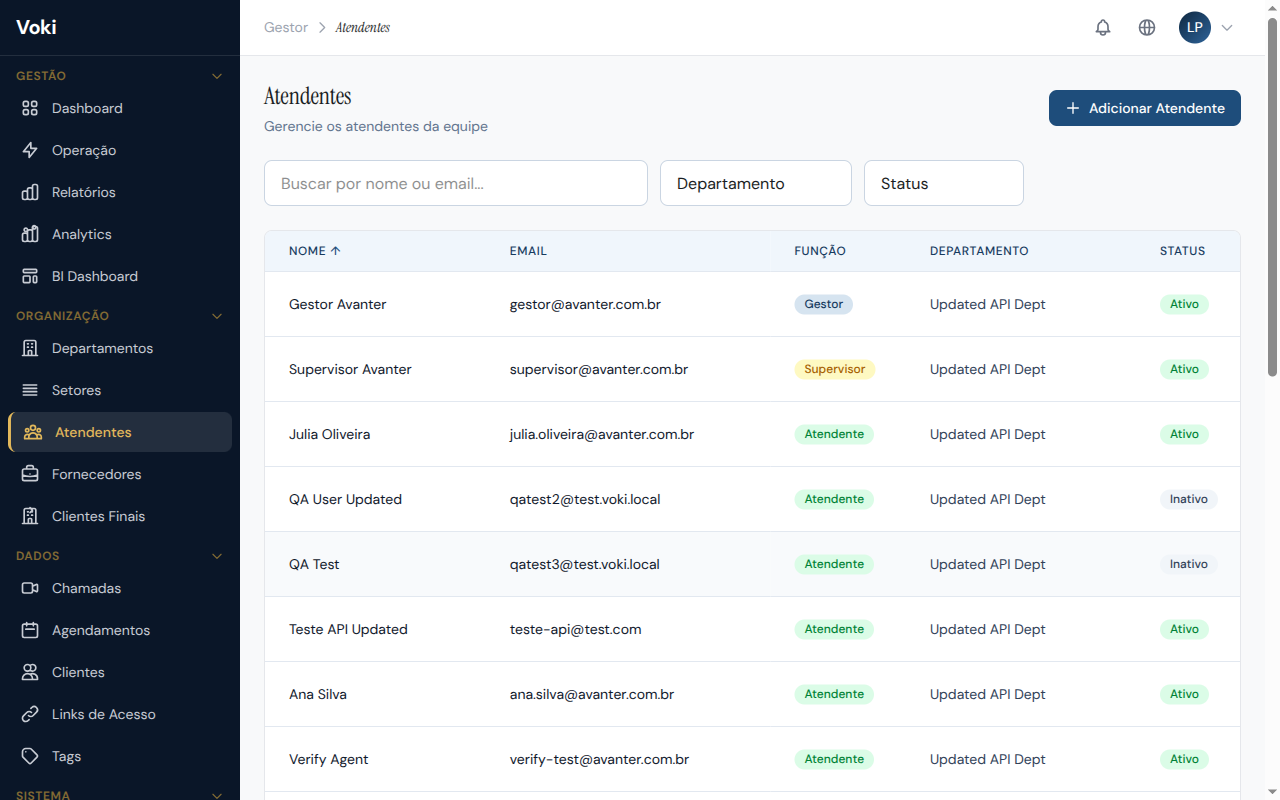
Create an Attendant
- In the sidebar menu, click "Attendants"
- Click the "New Attendant" button
- Fill in the form:
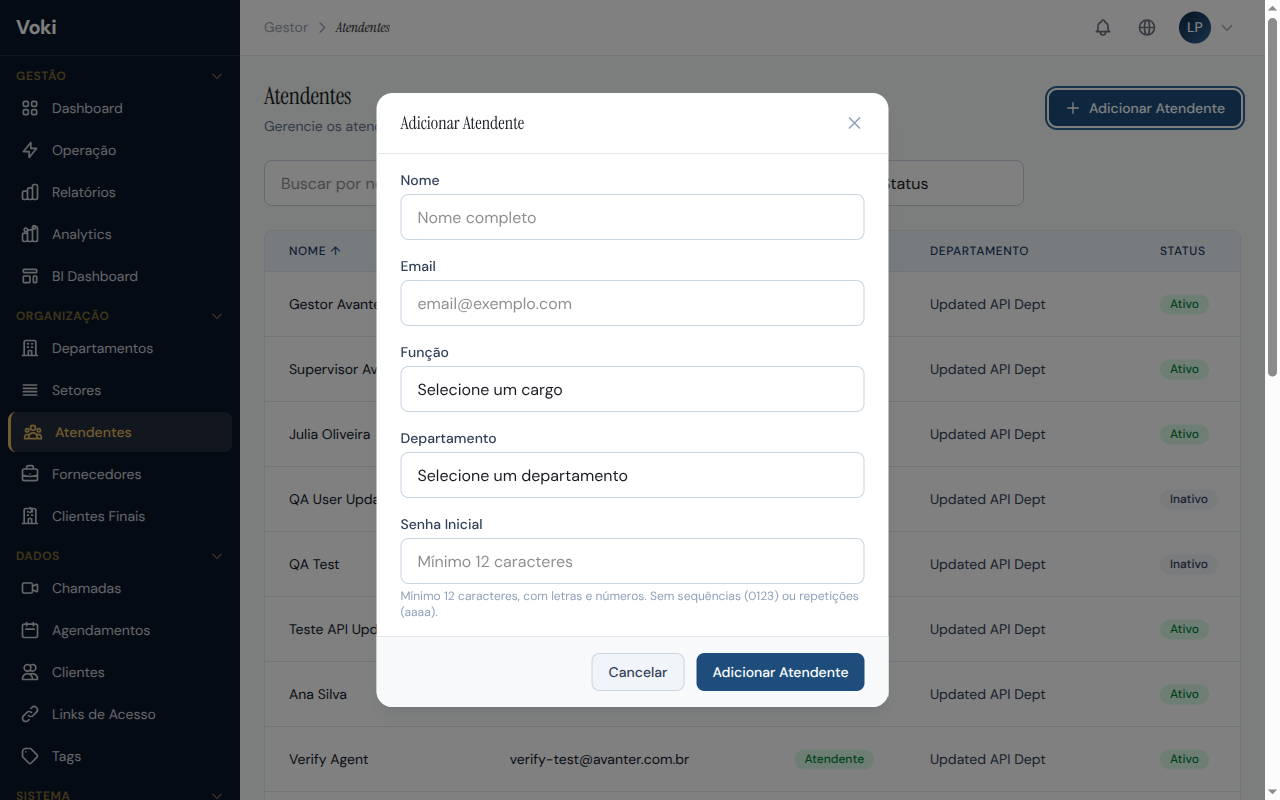
- Full name — name that will be displayed in calls and reports
- Email — will be used as the login credential
- Initial password — set a secure password for the first access
- Role — select the access level:
Attendant— access only to the WorkstationSupervisor— access to the Workstation and part of the Management PanelManager— full access to the Management Panel
- Click "Save"
Email invitation
The new attendant will receive an invitation email with their access credentials and a direct link to the platform.
Attendant limit
The maximum number of attendants depends on your plan. When the limit is reached, the system will display an alert indicating the need for an upgrade.
Activate and Deactivate Attendants
- Attendants can be temporarily deactivated without deleting the account
- Deactivated attendants cannot log in
- Deactivating an attendant frees up a slot within the plan limit
- To reactivate, simply go to the attendant's profile and click "Activate"
Assign to Departments
- On the attendant's detail page, locate the "Departments" section
- Select one or more departments the attendant should be assigned to
- The attendant will only receive calls from the selected departments
Orphan attendant protection
The system does not allow removing the last department from an attendant or supervisor. Every user with a service role must be linked to at least one department to ensure they can receive calls.
Calls
The Calls page presents the complete history of all calls made on the platform, with advanced filters and access to the details of each interaction.
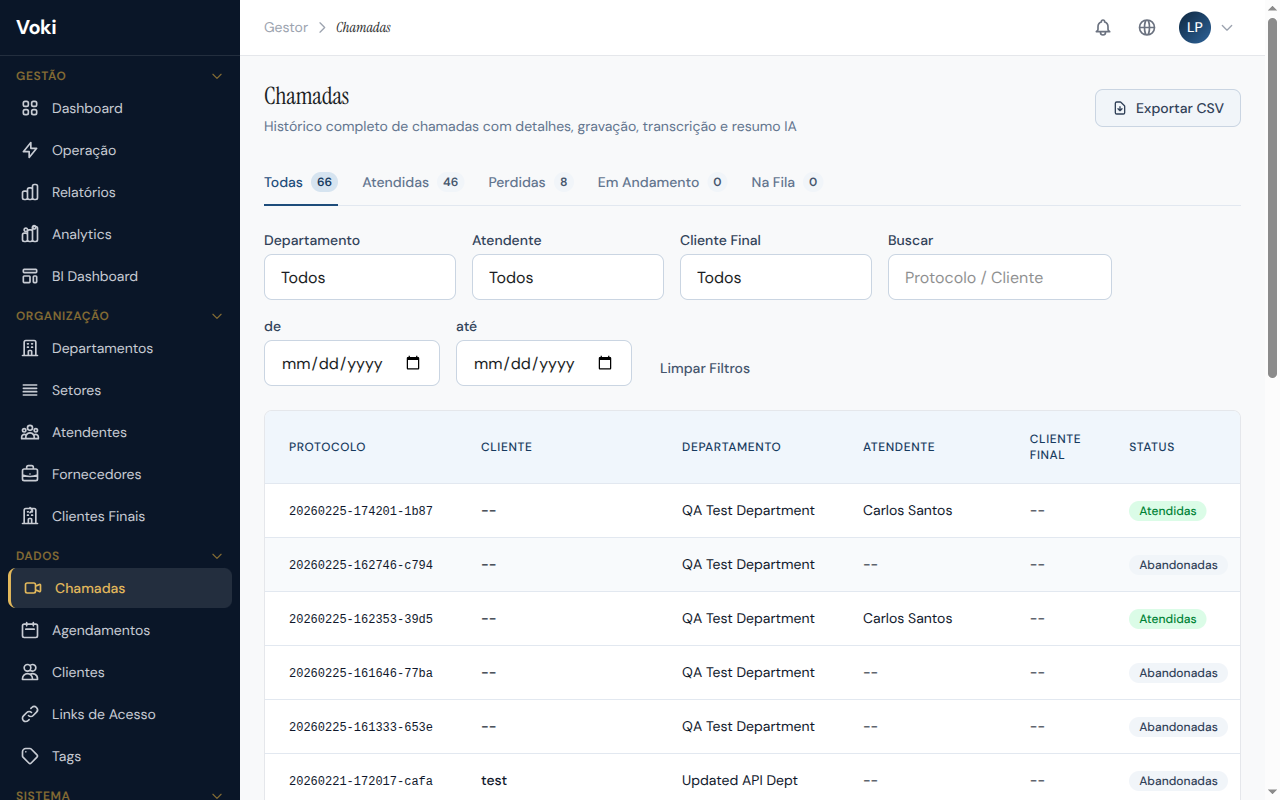
Search and Filters
Use the filters at the top of the page to find specific calls:
- Status — filter by: waiting, in progress, completed, missed, or transferred
- Period — select start and end dates
- Attendant — filter by responsible attendant
- Department — filter by department
- Client — search by client name or email
Call Details
When you click on a call in the list, a side panel displays all detailed information about the interaction:
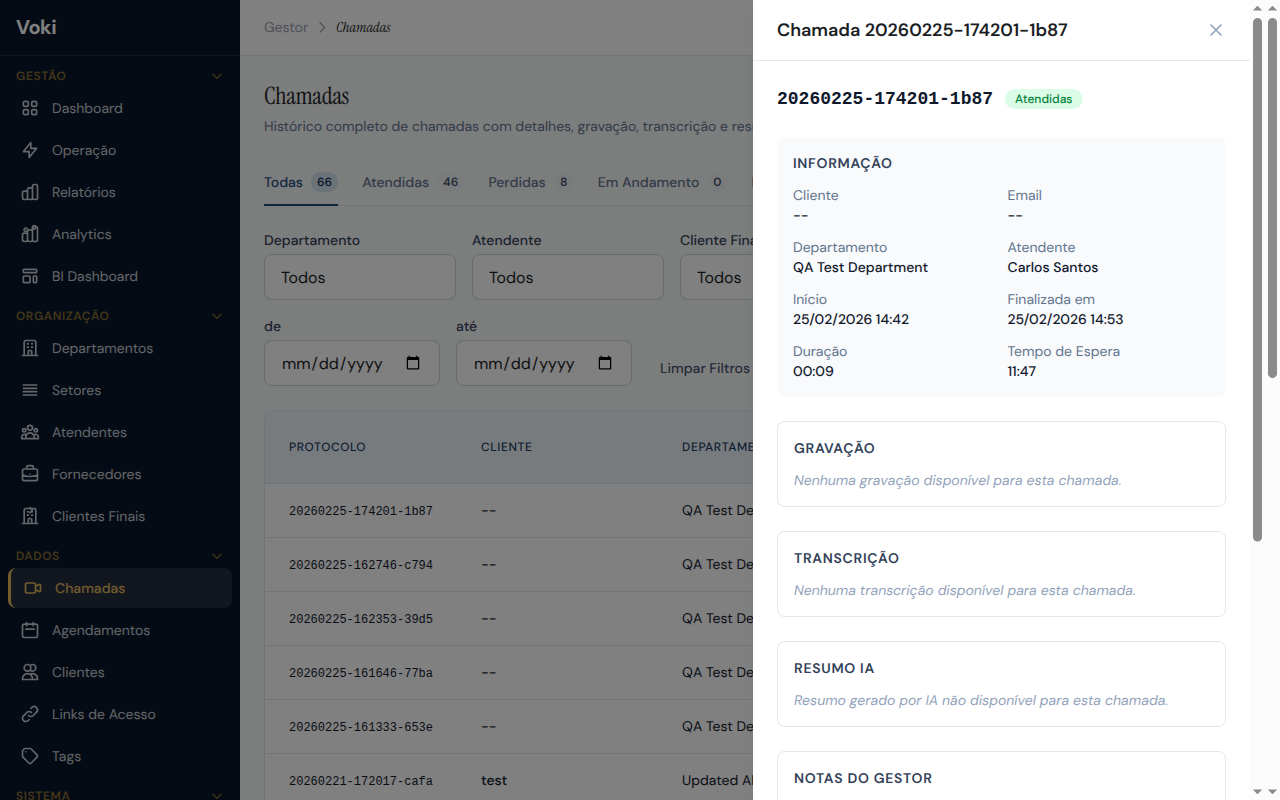
The panel includes:
- General information — date/time, duration, status, and protocol number
- Participants — attendant and client with their contact details
- Tags — classifications applied during or after the call
- CSAT Rating — satisfaction score and client comments
- Attendant notes — notes made during the call
- Transcript — full conversation text (when available on the plan)
- AI Summary — automatic summary generated by artificial intelligence
- Manager notes — observations added by managers after the call
Transcript and AI Summary
Availability
These features are available on plans that include AI transcription and summary features.
- Transcript — full text of the call, automatically generated during the conversation. Each speech segment is identified with the participant's name and timestamp
- AI Summary — automatic analysis of the call content, including key points discussed, required actions, and client sentiment analysis
Both are accessible directly in the call detail side panel.
Manager Notes
Owners, Managers, and Supervisors can add manager notes to completed calls. These notes are useful for attendant feedback, quality observations, or follow-up.
How to add a manager note:
- Access the details of a completed call
- Scroll to the "Manager Notes" section
- Type your observation and click "Add Note"
Notes are permanent
Manager notes are append-only: each note is recorded with a date/time and author name. Previous notes cannot be edited or removed, ensuring the integrity of the history for audit purposes.
Automatic Client Creation
When a client enters the service queue (via Access Link or Widget), the system automatically:
- Searches for the client by the email provided in the pre-service form
- If already exists, increments the total calls counter (
total_calls) - If not found, creates a new client record with name, email, and phone number
Client database always up to date
This automation ensures the Clients module is always up to date with all completed interactions, without the need for manual registration.
Recording Download
For recorded calls, the "Download Recording" button allows you to download the video file:
| Feature | Detail |
|---|---|
| Format | WebM |
| Maximum size | 200 MB per recording |
| Retention | 30 to 365 days, depending on the plan |
| Availability | Plans that include recording (Starter and above) |
Recording Consent
Before starting a recording, the system requests the client's consent to ensure compliance with LGPD (Brazilian Data Protection Law):
- The attendant clicks "Record" during the call
- The client receives a consent request notice on their screen
- The client can Accept or Decline the recording
- If the client declines, the attendant can resend the request
Mandatory recording
In departments configured with a mandatory recording policy (recording_policy = full):
- Consent is automatically requested when the call starts
- If the client declines, the call is terminated
- The consent status is recorded in the history
Call Reconnection
If a participant loses their connection during an active call:
- The system grants a 60-second grace period
- The other participant sees a "Reconnecting..." screen with a countdown
- If reconnection happens within 60 seconds, the call resumes automatically
- If the timer expires, the call is terminated with a
disconnectstatus
Reconnection record
The disconnected_at and reconnected_at fields are recorded in the call history for auditing and connection quality analysis purposes.
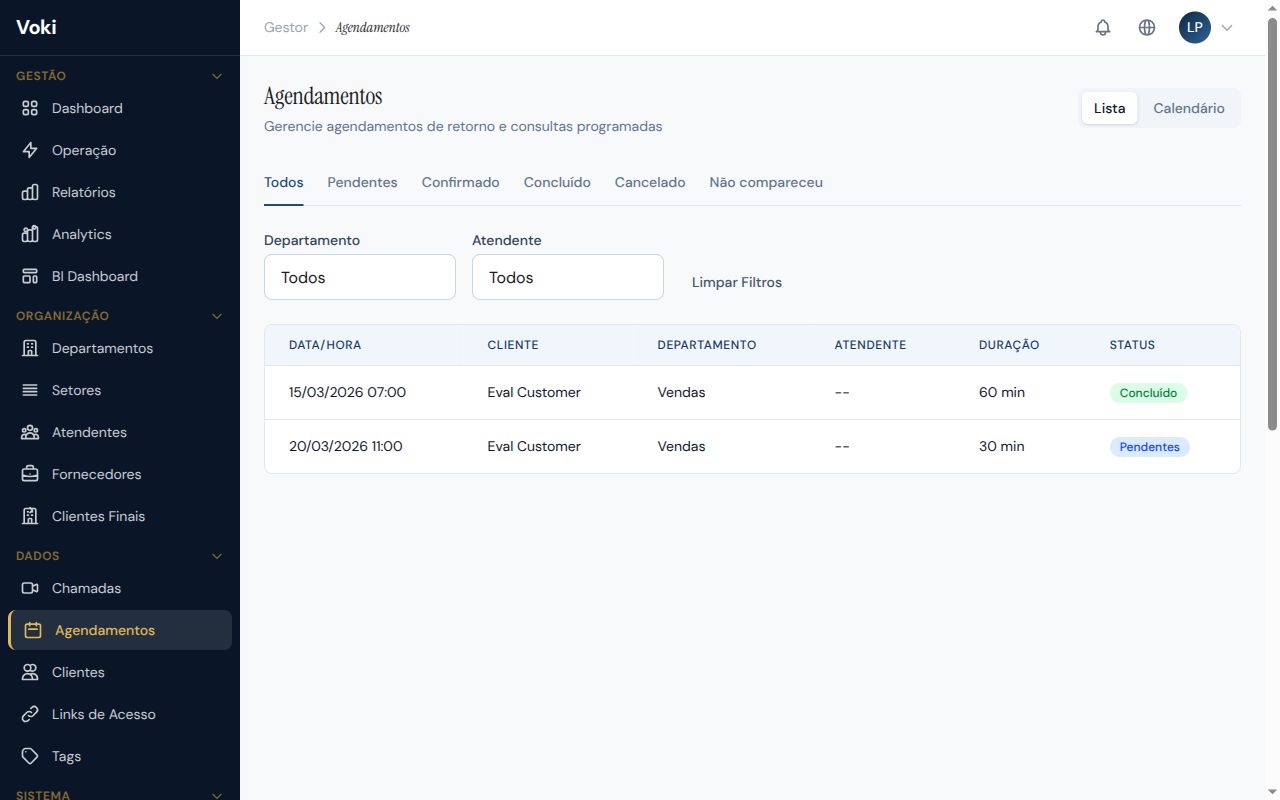
Schedules
The Schedules module allows you to schedule callbacks and future calls with clients, ensuring that no follow-up is forgotten.
Create a Schedule
- In the sidebar menu, click "Schedules"
- Click the "New Schedule" button
- Fill in the fields:
- Client — select an existing client or register a new one
- Date and time — when the call should take place
- Department — department responsible for the service
- Attendant — designated attendant (optional)
- Notes — relevant information for the call
- Click "Save"
Automatic conflict checking
The system automatically checks whether the chosen time conflicts with another schedule for the same attendant. If there is a conflict, an alert message will be displayed.
Schedule Statuses
Each schedule can have the following statuses:
| Status | Description |
|---|---|
| Pending | Schedule created, awaiting confirmation |
| Confirmed | Schedule confirmed by the attendant or manager |
| Completed | Scheduled call was successfully completed |
| Canceled | Schedule was canceled |
| No-show | Client did not attend at the scheduled time |
View Options
Schedules can be viewed in two formats:
- List — table with all schedules, filters, and sorting
- Calendar — day, week, or month view
Clients
The Clients module works as a basic integrated CRM, storing information about clients who use the video service. The database is automatically populated with each interaction.
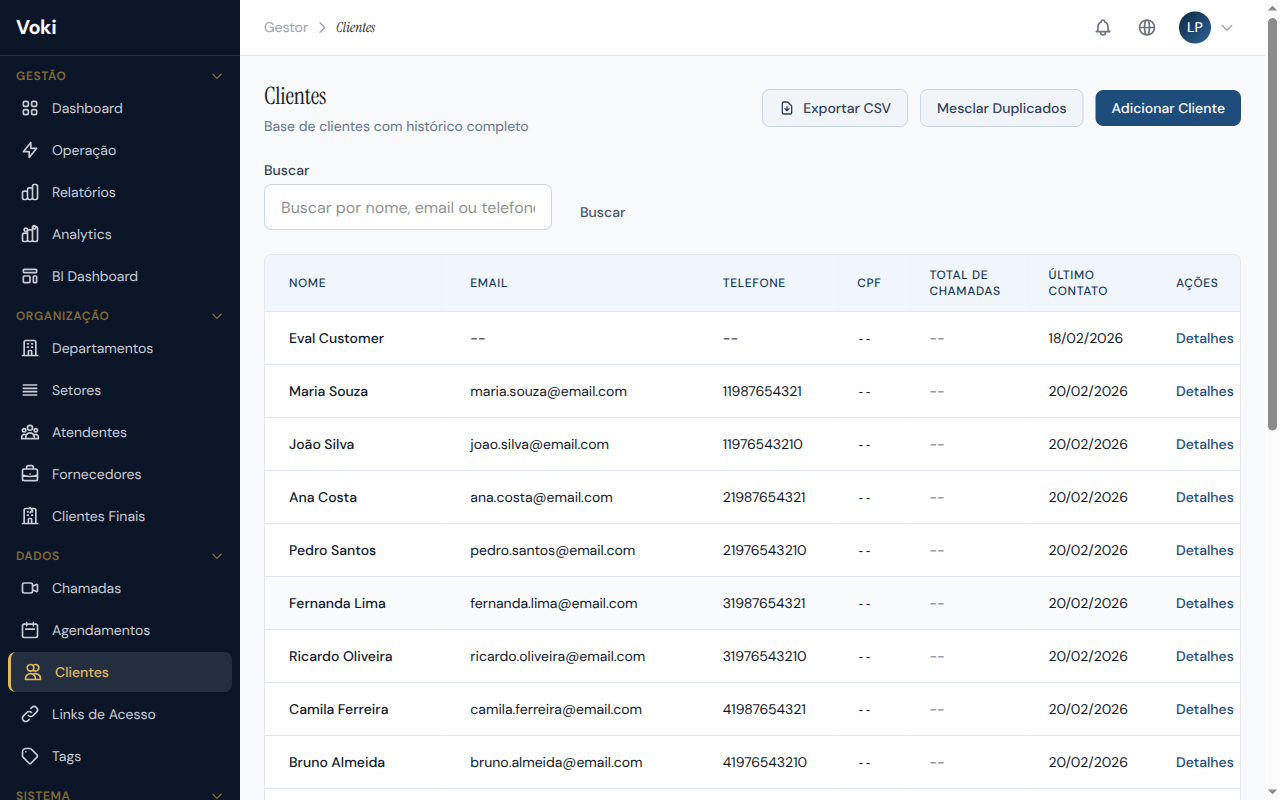
Client Database
The client database is automatically populated when a client accesses the service room and fills out the pre-service form. Managers can also register clients manually.
Search
Search for clients by:
- Name — partial search (e.g., "smith" finds "Smith," "Smithson," etc.)
- Email — search by email address
- Phone — search by phone number
Interaction History
On a client's detail page, you can view:
- All previous calls with dates and statuses
- CSAT/NPS ratings left by the client
- Tags applied to calls
- Internal notes recorded by attendants
Tags and Notes
- Add tags to clients for classification (e.g., "VIP," "Complaint," "Hot Lead")
- Record internal notes with relevant information for future interactions
Client Merge
If the same client has been registered more than once (with different data), you can perform a merge:
- Select the duplicate records
- Use the "Merge Clients" function
- The system consolidates the history into a single record, preserving all calls and ratings
Irreversible action
Client merging is an irreversible action. Carefully review the records before confirming the merge.
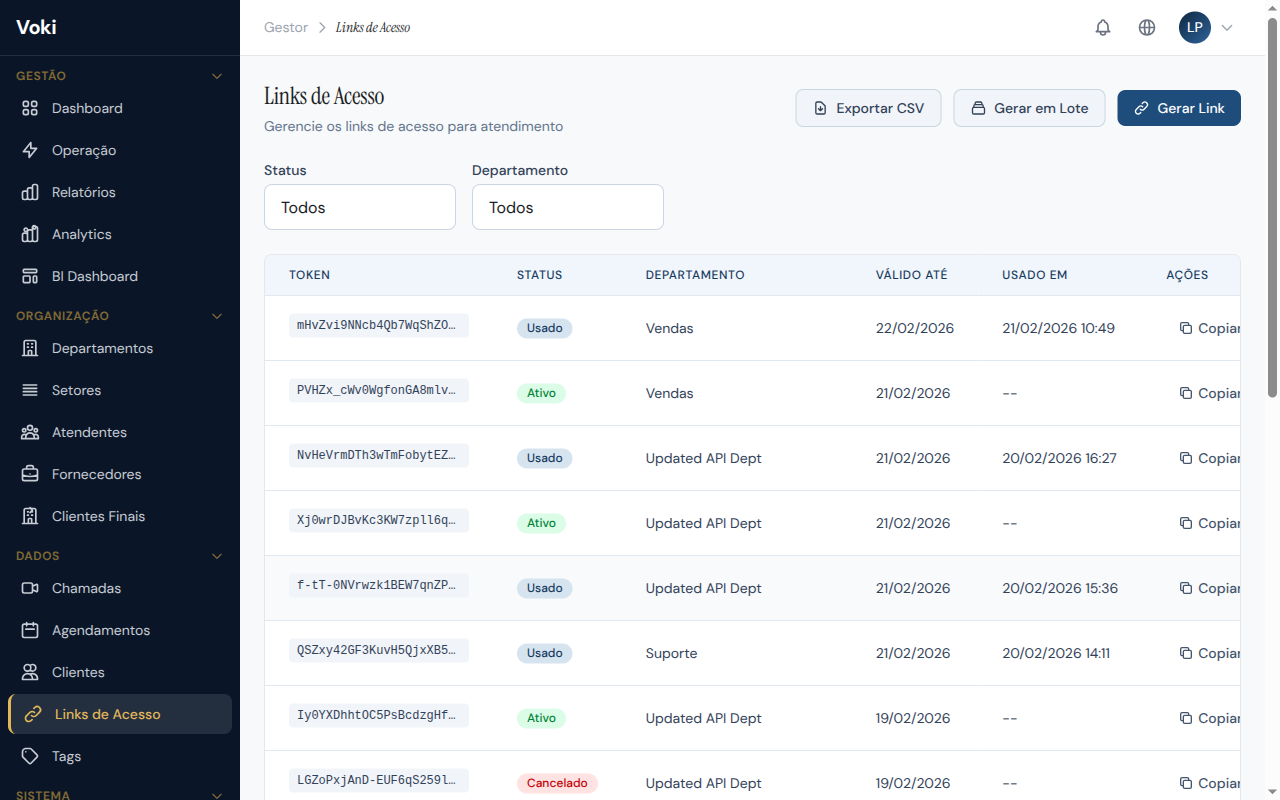
Access Links
Access Links are URLs you send to clients so they can access the video service room. They are the primary means of connecting your company with clients.
Link Types
| Type | Description |
|---|---|
| Single use | The link expires after being used once |
| Reusable | The link can be used multiple times (ideal for permanent links on websites) |
| Scheduled | The link only works at a specific time |
Create a Link
- In the sidebar menu, click "Access Links"
- Click the "New Link" button
- In the modal that appears, select:
- Department — which department the client will be directed to
- Type — single use, reusable, or scheduled
- Expiration — expiration date (optional)
- Click "Generate"
The system generates a URL in the format:
https://voki.avanter.com.br/call/{token}Send this link to the client via email, WhatsApp, SMS, or any other communication channel.
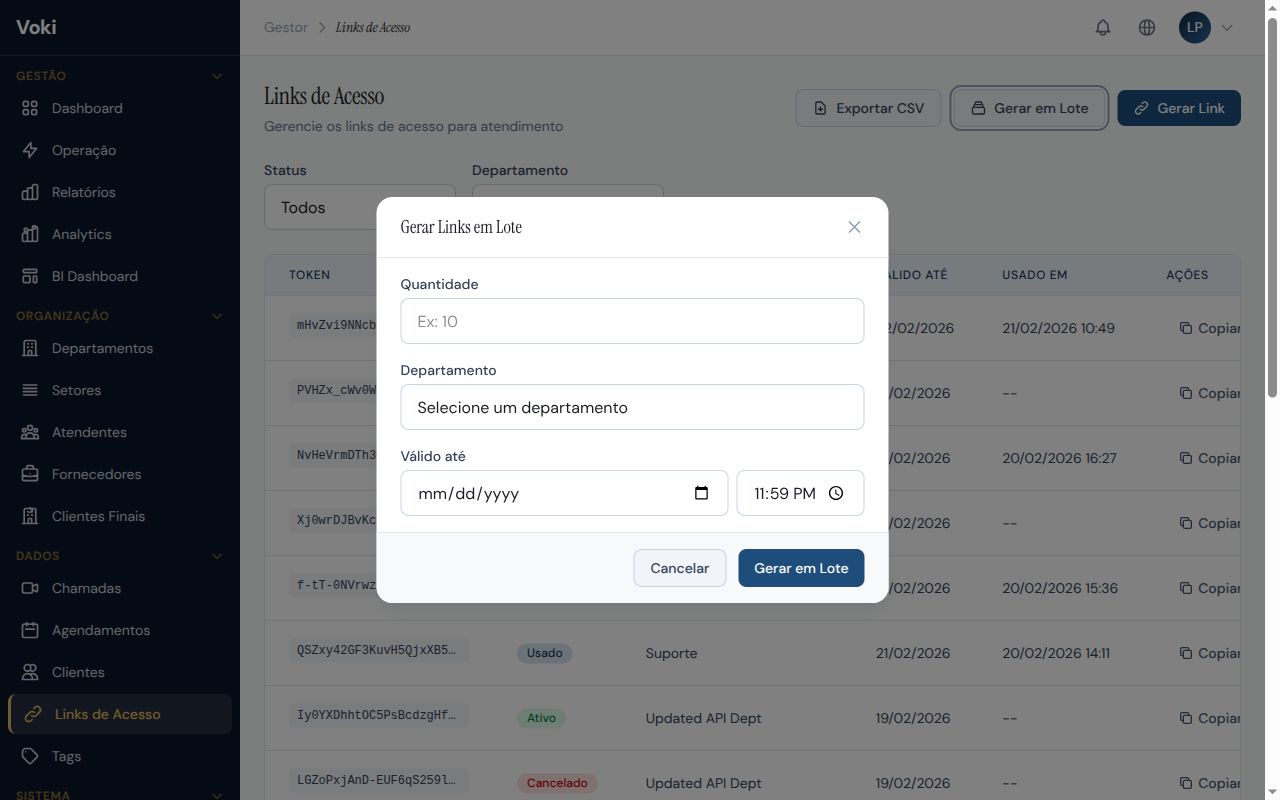
Batch Generation
To create multiple links at once:
- Click "Batch Generate"
- Enter the desired number of links
- Select the department and type
- The system generates all links and makes them available for download as a list
Tracking
For each link, you can view:
- How many times it was accessed
- Whether it has been used (for single-use links)
- Date and time of each access
- Status: active, used, expired, or canceled
Automatic Link Sending
Each link has a "Send" button that opens a modal for automatic delivery:
- In the link list, click the "Send" button for the desired link
- Select the channel: Email, SMS, or WhatsApp
- Enter the recipient (email address or phone number with area code)
- Optionally, customize the message
- Click "Send"
Prerequisite
The selected channel's provider must be configured in the Notification Providers section. SMS and WhatsApp channels are available only on Professional plans and above.
Invite Participant During Call
In the Workstation, during an active call, the attendant can click the "Invite Participant" button in the control bar to send an access link via Email, SMS, or WhatsApp directly, without leaving the call.
Dial Lists
Dial Lists allow you to organize contact lists for outbound call campaigns, facilitating the work of teams that proactively reach out to clients.
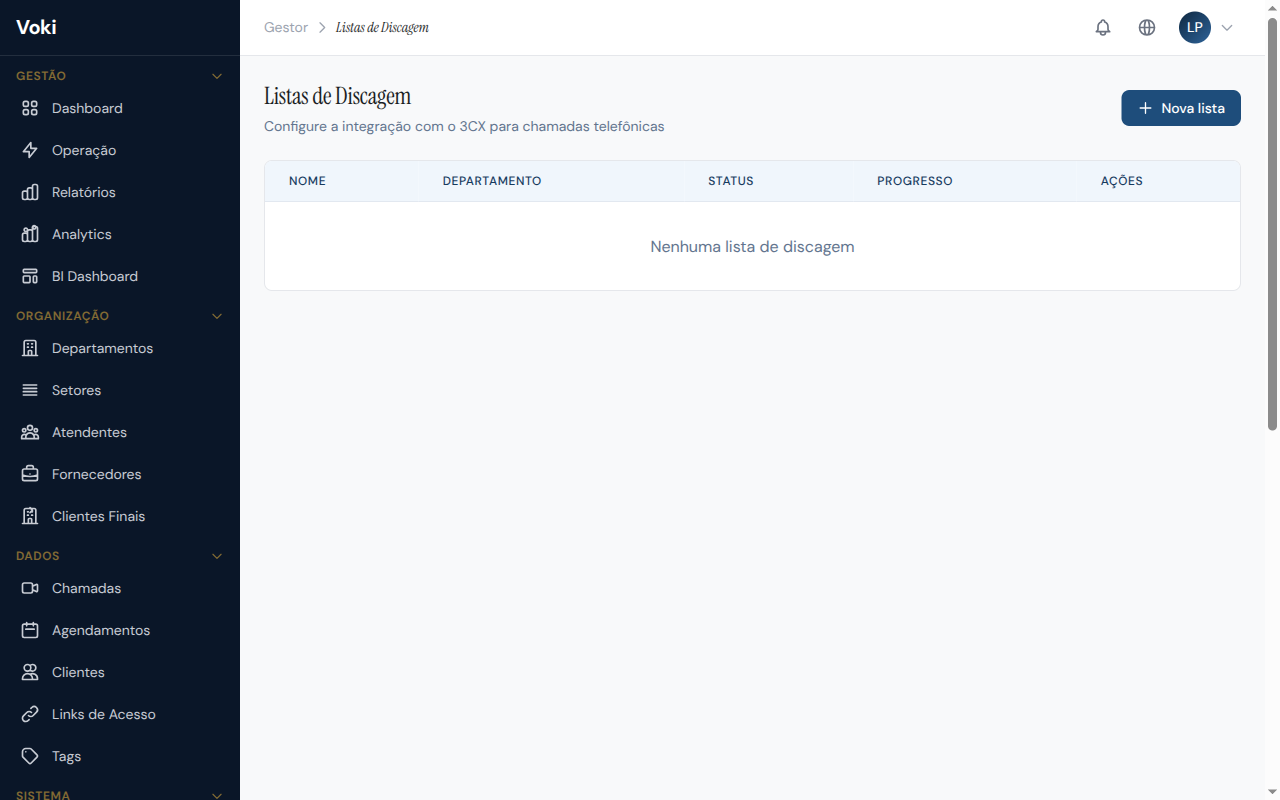
Features
- Create lists — organize contacts into themed lists (e.g., "January Campaign," "Pending Callbacks")
- Import contacts — add contacts manually or via import
- Track progress — see how many contacts have already been reached in each list
- Distribute — assign lists to specific attendants or departments
Tags
Tags allow you to classify calls and clients flexibly, creating custom categories for analysis and organization of interactions.
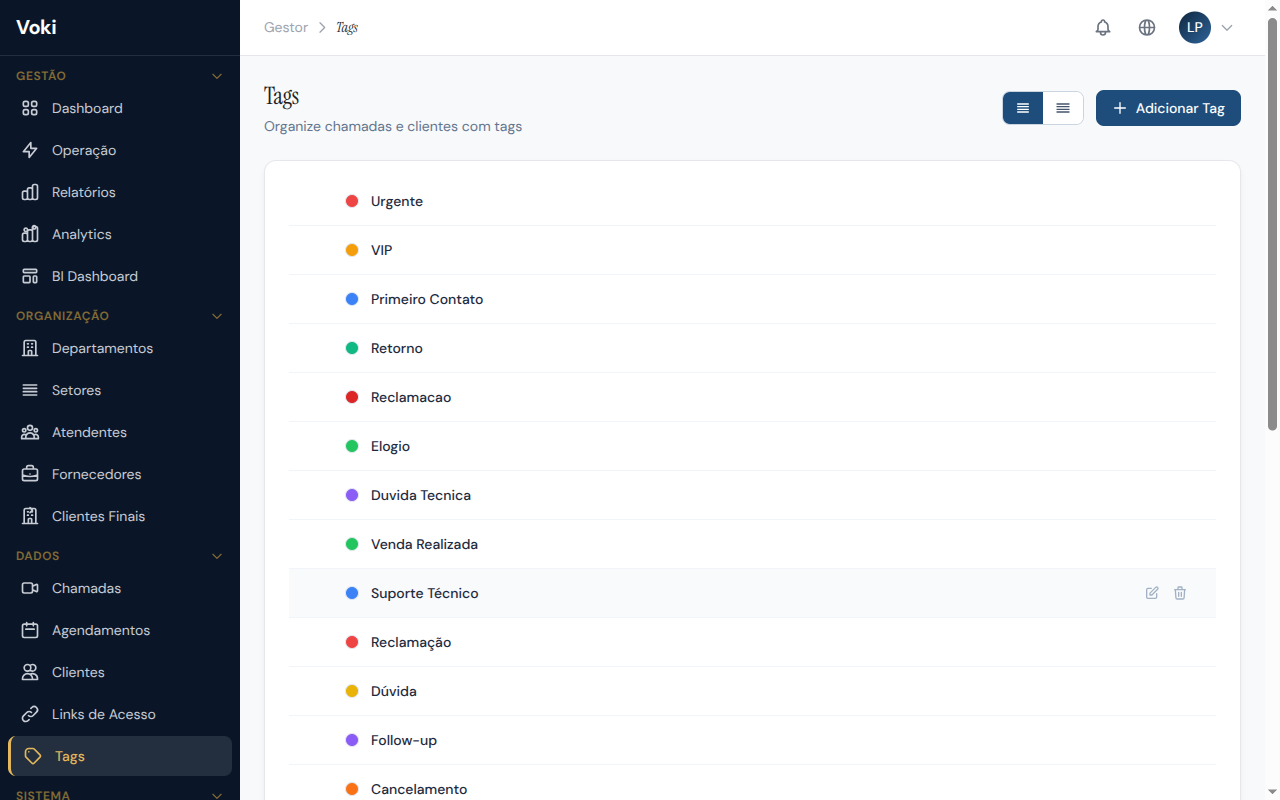
Create Tags
- In the sidebar menu, click "Tags"
- Click the "New Tag" button
- Define:
- Name — descriptive text (e.g., "Sale Completed," "Technical Issue")
- Color — color for quick visual identification
- Parent tag — optional, to create a tag hierarchy
Tag Hierarchy
Tags can be organized in a tree structure (parent/child):
Service
  ├── Technical Support
  │     ├── Bug
  │     └── Question
  └── Sales
        ├── Sale
        └── Quote
Usage in Calls
Tags are applied at three points:
- During the call — by the attendant in the Workstation
- At finalization — through the call closing modal
- Afterwards — by the manager on the call details page
Reports by tag
Tags appear in reports and Analytics, enabling segmented analysis by type of interaction.
Interaction Tools
Interaction Tools are additional resources that attendants can use during a video call to enrich the service with business-specific functionalities.
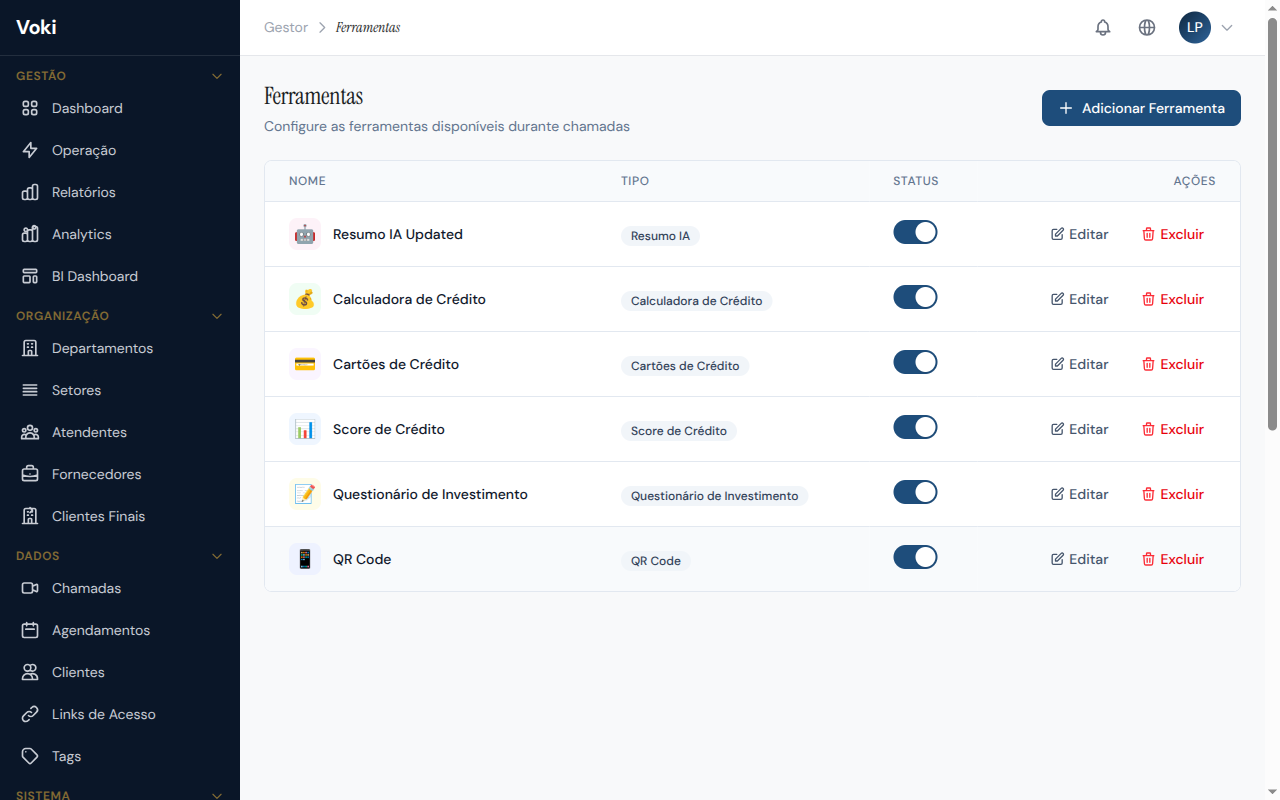
Available Tools
| Tool | Description |
|---|---|
| Credit Score | Client credit score lookup and classification |
| Loan Calculator | Installment, rate, and term simulation |
| Investment Quiz | Interactive questionnaire for investor profile |
| QR Code | QR code generation for sharing information |
| AI Summary | Automatic call summary generation via artificial intelligence |
Configuration
- In the sidebar menu, click "Interaction Tools"
- View the tools available on your plan
- Enable or disable each tool as needed
- Configure specific parameters for each tool
Credit Score
- Classify Score — analyze the credit score and obtain the classification (A, B, C, D, E)
- Calculate Score — compute a score based on customizable parameters
- Score Ranges — view the configured classification ranges
Loan Calculator
- Simulate Loan — calculate installments based on amount, rate, and term
- Amortization Table — view the complete payment schedule (constant amortization or fixed installment)
- Find Rate — calculate the interest rate based on the desired amount and installment
Settings
The Settings page brings together all company preferences on the platform. Here you customize the system's behavior to meet the specific needs of your business.
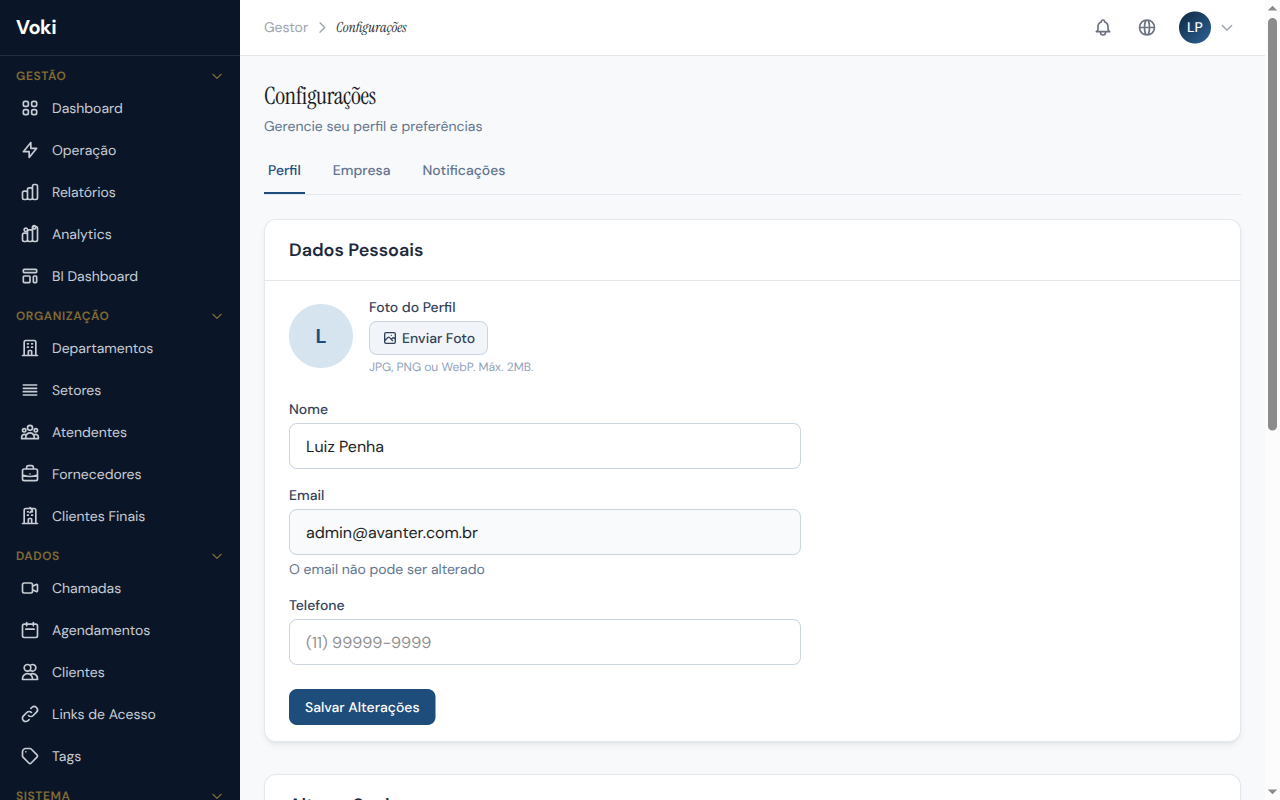
Company Profile
- Company name — name displayed to clients in the waiting room and in emails
- Logo — image used in the widget and waiting rooms
- Registration data — tax ID, address, and phone number
Notification Preferences
Configure how and when to receive notifications:
- Browser push notifications — real-time alerts when a client enters the queue
- Alert sounds — audio notification for new calls
- Email summaries — periodic performance reports sent automatically
Webhooks
Configure external endpoints to receive system event notifications. See the Webhooks and Integrations documentation for technical details.
Billing Information
- View your current plan and renewal date
- Check the payment history
- Access plan upgrade information
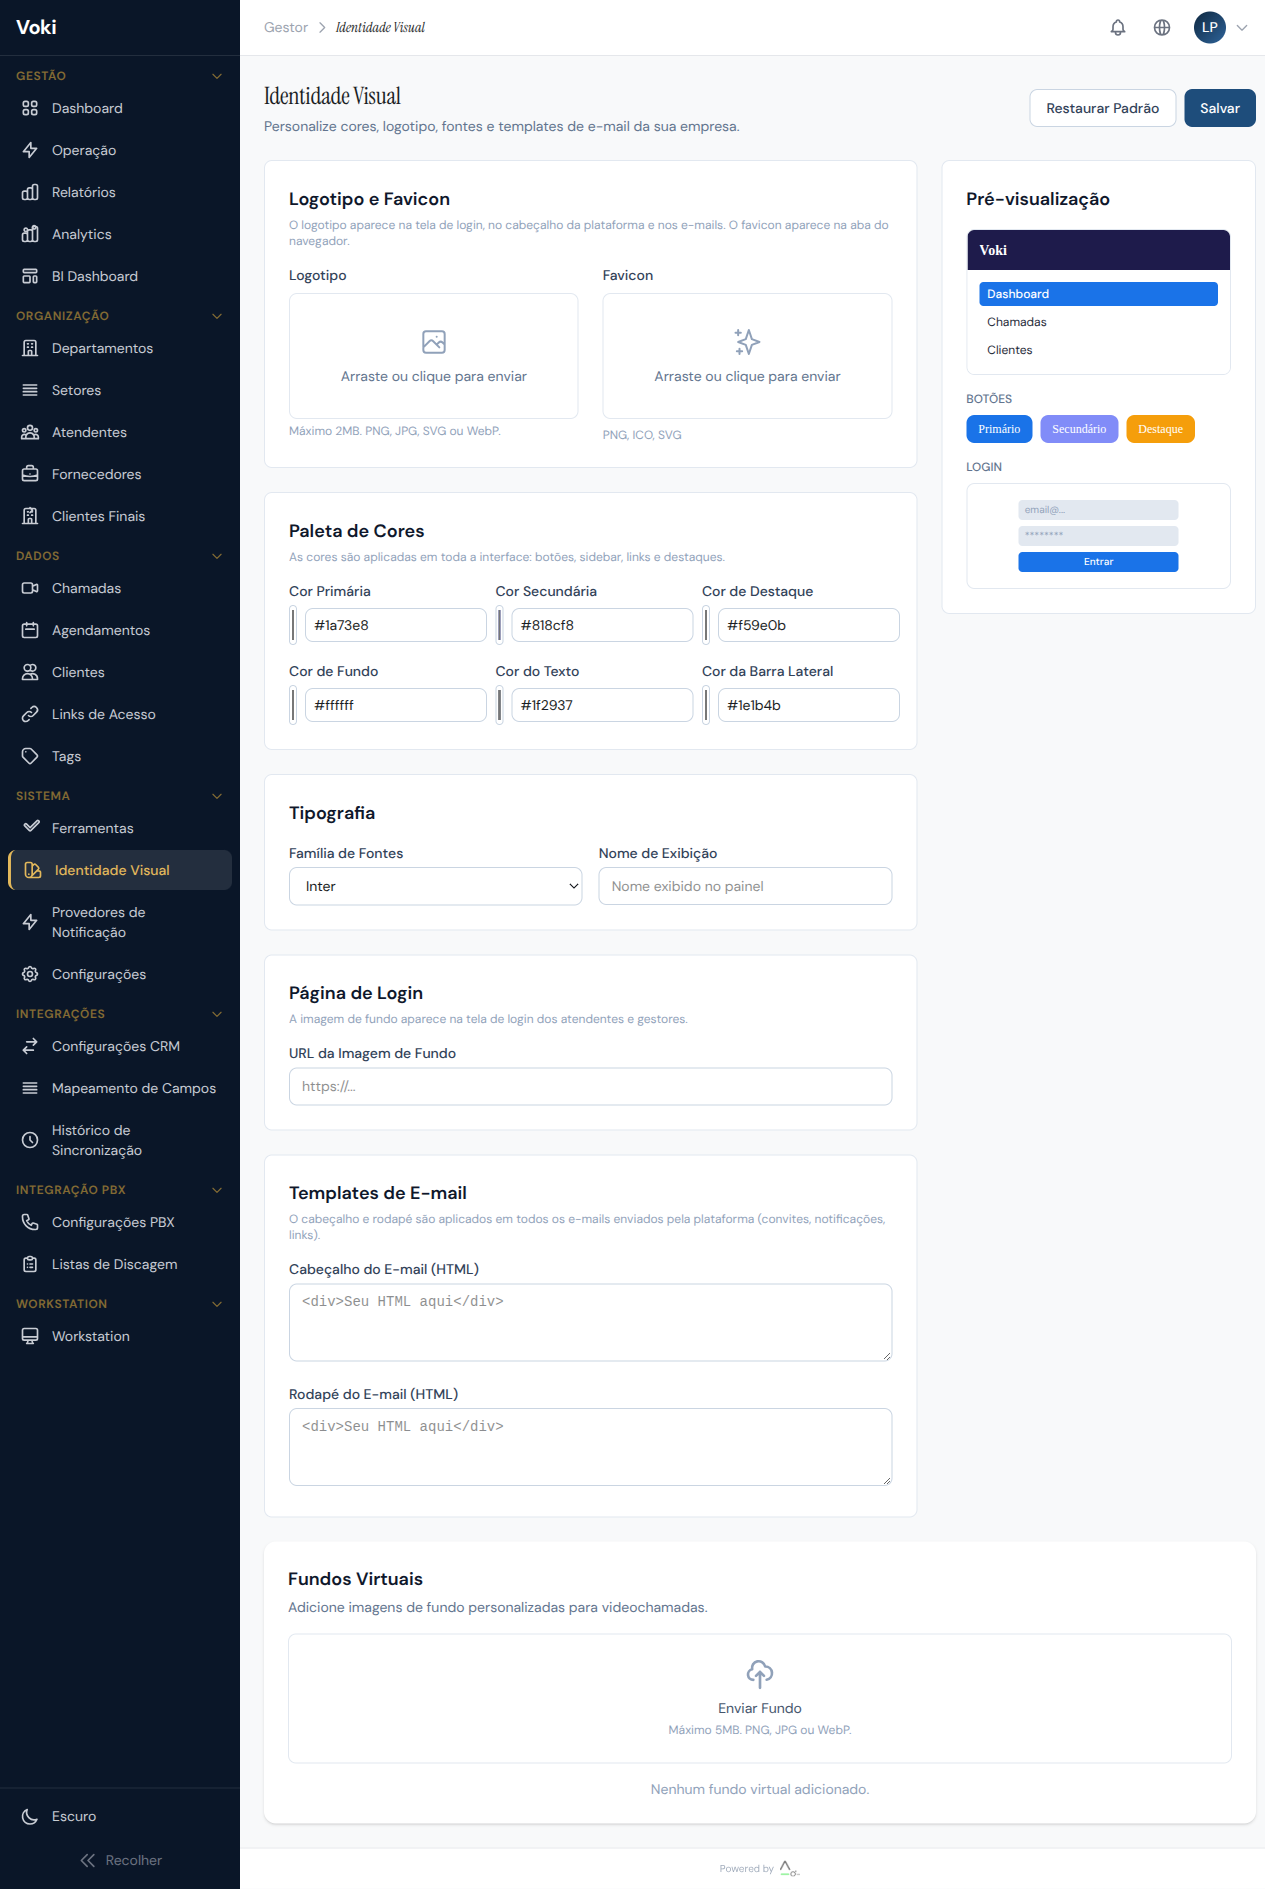
Visual Customization (Branding)
The Branding page allows you to fully customize the platform's appearance for your company, creating a unique white-label visual experience. Your clients will see your company's visual identity across all screens.
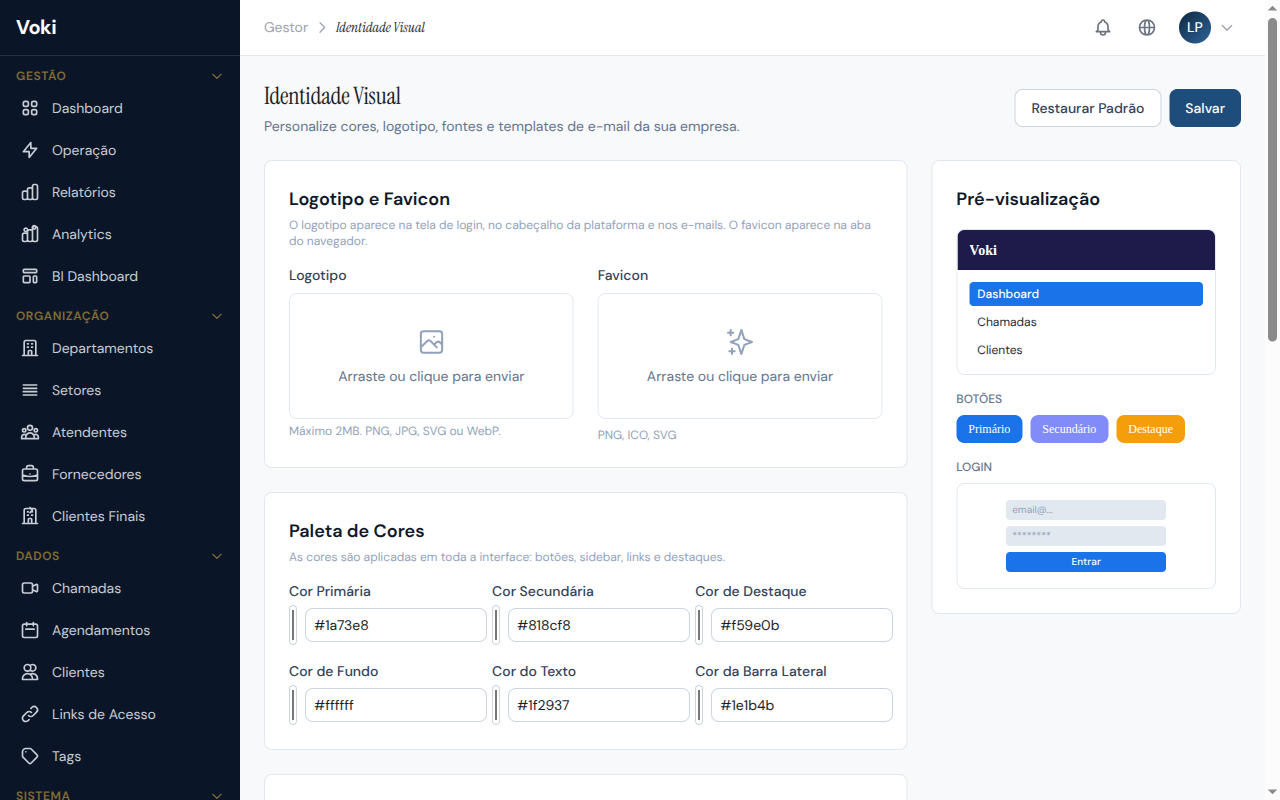
Logo and Favicon
- In the sidebar menu, click "Branding"
- Upload your company logo (PNG, SVG, or JPG, max 2MB)
- Upload the favicon (ICO, PNG, or SVG, max 1MB)
- The logo will appear in the sidebar menu, on the login page, and in service rooms
Color Palette
Configure 6 colors to customize the entire interface:
| Color | Description |
|---|---|
| Primary color | Buttons, links, and main highlights |
| Secondary color | Complementary elements |
| Accent color | Notifications and alerts |
| Background color | General interface background |
| Text color | Main text |
| Sidebar color | Navigation sidebar |
Automatic application
Colors are automatically applied throughout the interface via dynamic CSS variables. You'll see a live preview of the changes before saving.
Typography
Select the main font from the available options:
- Inter (default)
- Roboto
- Open Sans
- Poppins
- Lato
Virtual Backgrounds
In the backgrounds section, you can register custom virtual backgrounds that attendants can use during calls:
- Scroll to the "Backgrounds" section
- Click "Add Background"
- Upload the image (PNG or JPG, recommended resolution: 1920x1080)
- Set a descriptive name for the background
- Optionally, set a background as default for each department
Technical requirements
Virtual backgrounds use MediaPipe for real-time segmentation. For best results, we recommend images with a 16:9 aspect ratio and good lighting in the attendant's environment.
Login Page
- Upload a custom background image for the login page
- Set a custom welcome text
Email Templates
- Configure the HTML header for emails sent by the platform
- Configure the HTML footer with company information
- View a preview of the result in the preview panel
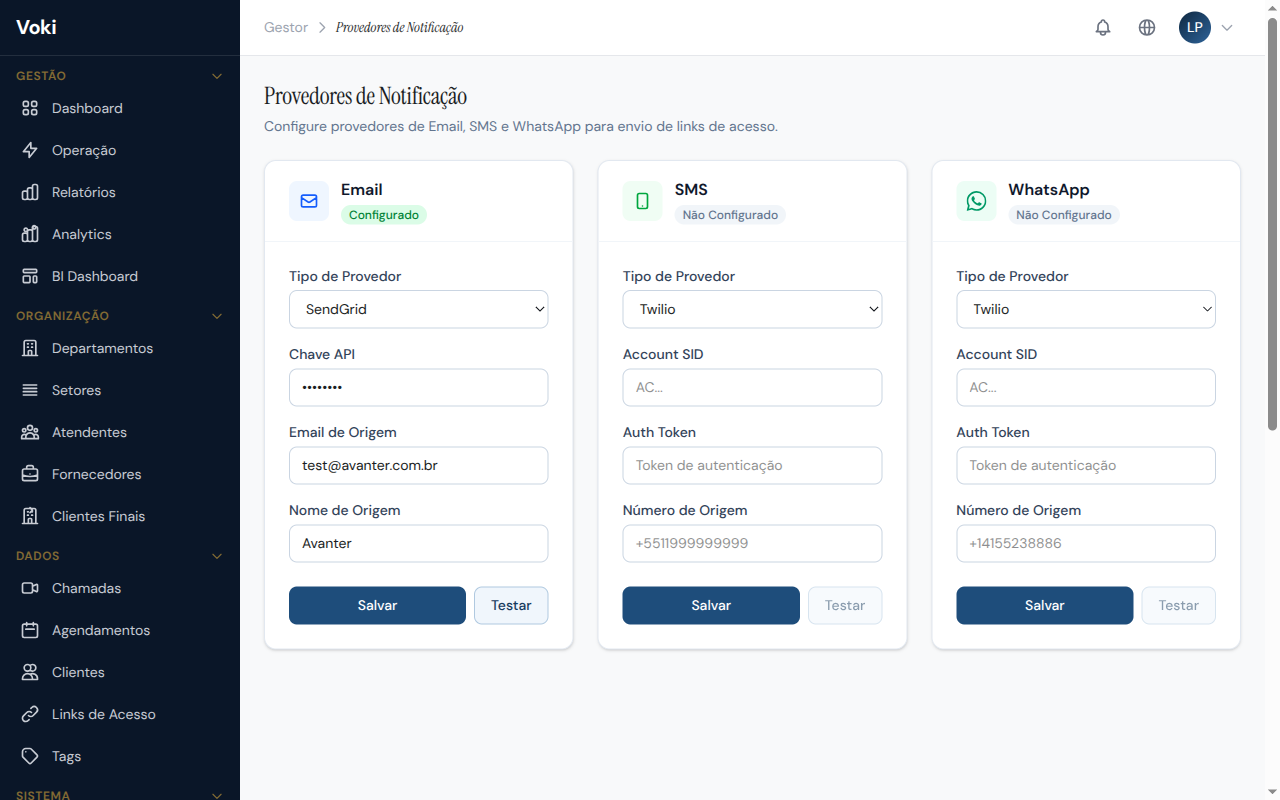
Notification Providers
Configure service providers for automatic link sending and notifications via Email, SMS, and WhatsApp. This configuration is required to use automatic access link sending.
Supported Providers
| Channel | Available Providers |
|---|---|
| SendGrid, SMTP, Mailgun | |
| SMS | Twilio, Zenvia, Vonage |
| Twilio, Z-API, Evolution API |
Configure a Provider
- In the sidebar menu, go to "Notification Providers" (System section)
- Select the desired channel (Email, SMS, or WhatsApp)
- Choose the provider from the dropdown
- Fill in the credentials according to the selected provider:
- Email (SendGrid) — API Key + sender email + sender name
- SMS (Twilio) — Account SID + Auth Token + sender number
- WhatsApp (Twilio) — Account SID + Auth Token + WhatsApp number
- Click "Save"
Test Connection
After configuring, use the "Test" button to send a test message and validate that the credentials are correct:
- Click the "Test" button next to the configured provider
- Enter a test recipient
- The result (success or error) will appear as a notification on screen
Credential security
Credentials are stored encrypted (AES-256-GCM). In the interface, passwords and tokens are displayed masked, showing only the last 4 characters.
Availability by plan
SMS and WhatsApp channels are available only on Professional plans and above.
Multi-Participant Video Calls
Voki supports video calls with up to 100 simultaneous participants, using LiveKit SFU (Selective Forwarding Unit) technology to optimize quality and performance.
How It Works
- P2P calls (default) — for 2 participants, Voki uses a direct WebRTC peer-to-peer connection
- SFU calls — for 3 or more participants, the LiveKit server selectively routes video streams, optimizing bandwidth
Video Grid
The video grid adapts automatically to the number of participants:
| Participants | Layout |
|---|---|
| 1-2 | Side by side |
| 3-4 | 2x2 grid |
| 5-9 | 3x3 grid |
| 10-16 | 4x4 grid |
| 17+ | Gallery with scroll |
Each participant tile displays:
- Video or avatar (if camera is off)
- Participant's name
- Microphone indicator (muted/active)
- Pin button for highlighting
Limits by Plan
| Plan | Mode | Max. Participants |
|---|---|---|
| Free | P2P only | 2 |
| Starter | SFU | 10 |
| Business | SFU | 20 |
| Professional | SFU | 50 |
| Enterprise | SFU | 100 |
Supervision (Monitor / Whisper / Barge)
Supervisors can join calls in three special modes:
| Mode | Description |
|---|---|
| Monitor | The supervisor watches the call without being seen or heard by participants. Ideal for quality evaluation |
| Whisper | The supervisor speaks only to the attendant — the client cannot hear. Useful for real-time coaching |
| Barge | The supervisor enters the call as a full participant, visible and audible to everyone |
Strategic use of supervision
Use Monitor mode for quality evaluation, Whisper to coach attendants in training, and Barge to intervene when necessary.
Server-Side Recording
With LiveKit Egress, recordings are made on the server, not in the browser:
- Composite recording — all participants in a single video
- No performance impact — the attendant's browser is not affected
- Automatic saving — file saved automatically after the call ends
Integrations
Voki offers integrations with external systems to extend the platform's capabilities. Available integrations depend on the contracted plan.
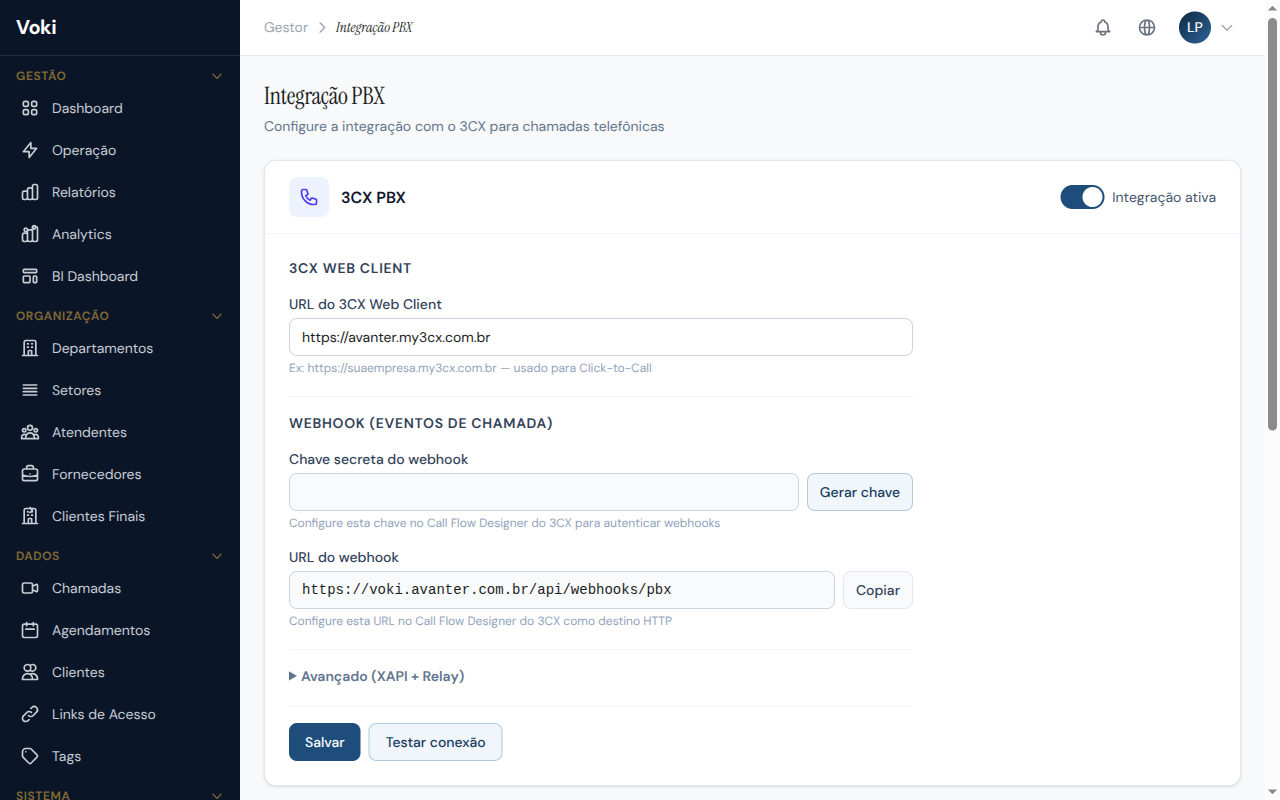
PBX 3CX Integration
Availability
The PBX 3CX integration is available on Enterprise plans. A 3CX Professional license or higher is required.
The PBX 3CX integration allows you to connect your company's telephone system to Voki, unifying video and phone service in a single platform.
Features
- Click2Call — initiate phone calls directly from the Voki panel by clicking on the client's number
- Call logging — phone calls made via 3CX are automatically logged in Voki's history
- Associated extensions — link 3CX extensions to Voki attendants for complete tracking
- Webhooks — receive phone call events (ringing, answered, ended) in real time
Configure the PBX Integration
- In the sidebar menu, go to "Settings" > "PBX"
- Fill in the configuration fields:
- Webclient URL — 3CX webclient address (e.g.,
https://yourcompany.my3cx.com.br/webclient) - Webhook Secret — click "Generate Secret" to create a secure token
- Webclient URL — 3CX webclient address (e.g.,
- Click "Save"
Register Extensions
- In the "Extensions" section, click "Add Extension"
- Enter the extension number (e.g., 9001)
- Associate the extension with the corresponding attendant
- Repeat for each extension you want to monitor
Extension filter
The system only processes calls involving registered extensions. Calls from unregistered extensions are automatically ignored, preventing noise in reports.
Configure 3CX
To have 3CX send events to Voki, you need to configure the CRM integration template in 3CX:
- In the 3CX panel, go to "Settings" > "CRM Integration"
- Import the Voki template (available through support)
- The template automatically configures the webhooks for call events
Click2Call
With Click2Call configured, clicking a phone number in Voki will automatically open the 3CX webclient and start dialing. Make sure the 3CX webclient is open in a browser tab.
Duration Format
3CX sends call durations in variable formats (MM:SS, HH:MM:SS, or seconds). Voki automatically recognizes and converts all formats to ensure accuracy in reports.
Salesforce CRM Integration
Availability
The Salesforce CRM integration is available exclusively on the Enterprise plan and requires a Salesforce instance with API access.
The Salesforce CRM integration allows you to automatically synchronize Voki service data with Salesforce, creating a unified view of the customer relationship.
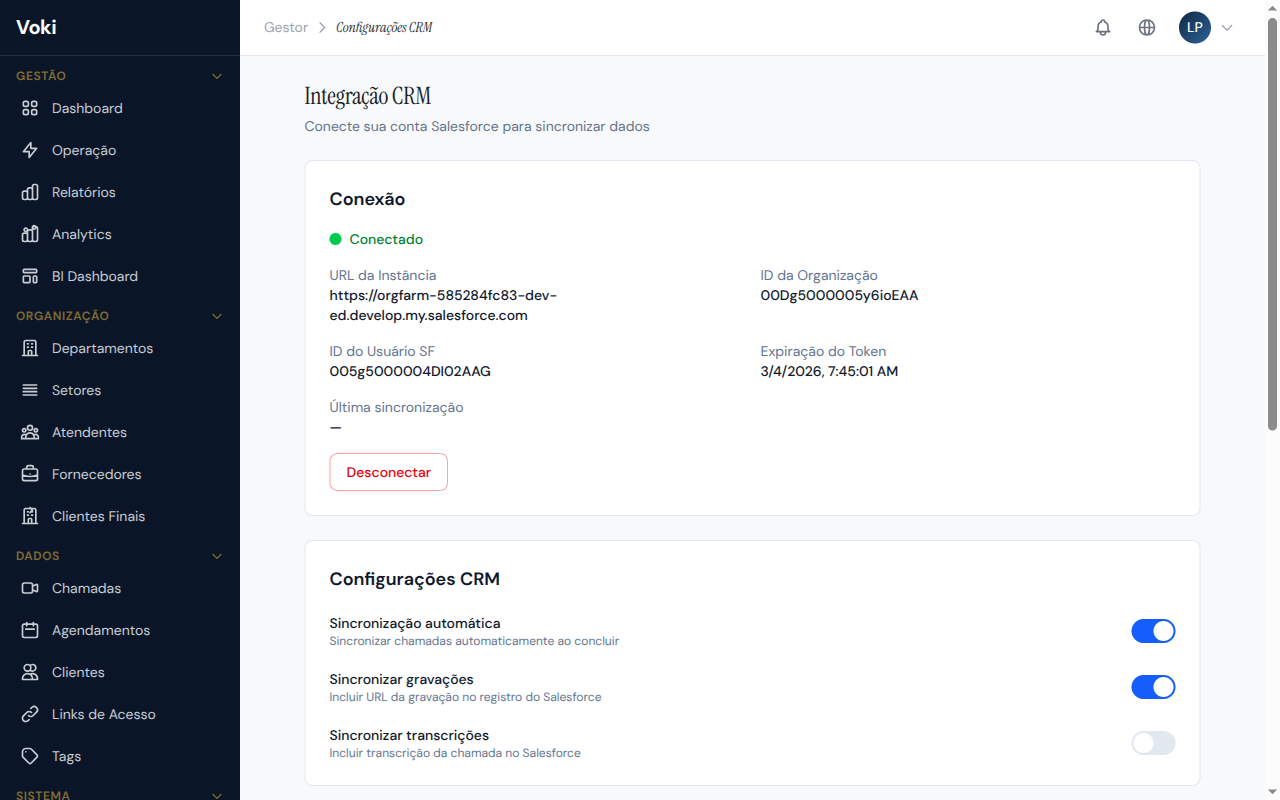
Features
- Automatic synchronization — clients and calls are automatically synchronized between Voki and Salesforce
- CTI (Click-to-Call) — initiate video calls directly from Salesforce
- Field mapping — configure how Voki fields correspond to Salesforce fields
- Bulk synchronization — export historical data to Salesforce via Bulk API
- Sync logs — track the status of each synchronization in real time
Connect to Salesforce
- In the sidebar menu, go to "Settings" > "CRM"
- Click the "Connect to Salesforce" button
- You will be redirected to the Salesforce authorization page
- Log in with your Salesforce account and authorize Voki
- After authorization, you will be redirected back to Voki with the connection active
Secure OAuth
The connection uses OAuth 2.0, the industry-standard security protocol. Voki never stores your Salesforce password — only encrypted access tokens that can be revoked at any time.
Field Mapping
After connecting to Salesforce, configure how Voki fields correspond to Salesforce fields:

- Go to the "Field Mapping" tab
- For each Voki field, select the corresponding Salesforce field
- Configure required and optional fields
- Click "Save Mapping"
Custom fields
If you have custom fields in Salesforce, they will automatically appear in the list of available fields for mapping.
Sync Logs
Track the status of each synchronization in real time:
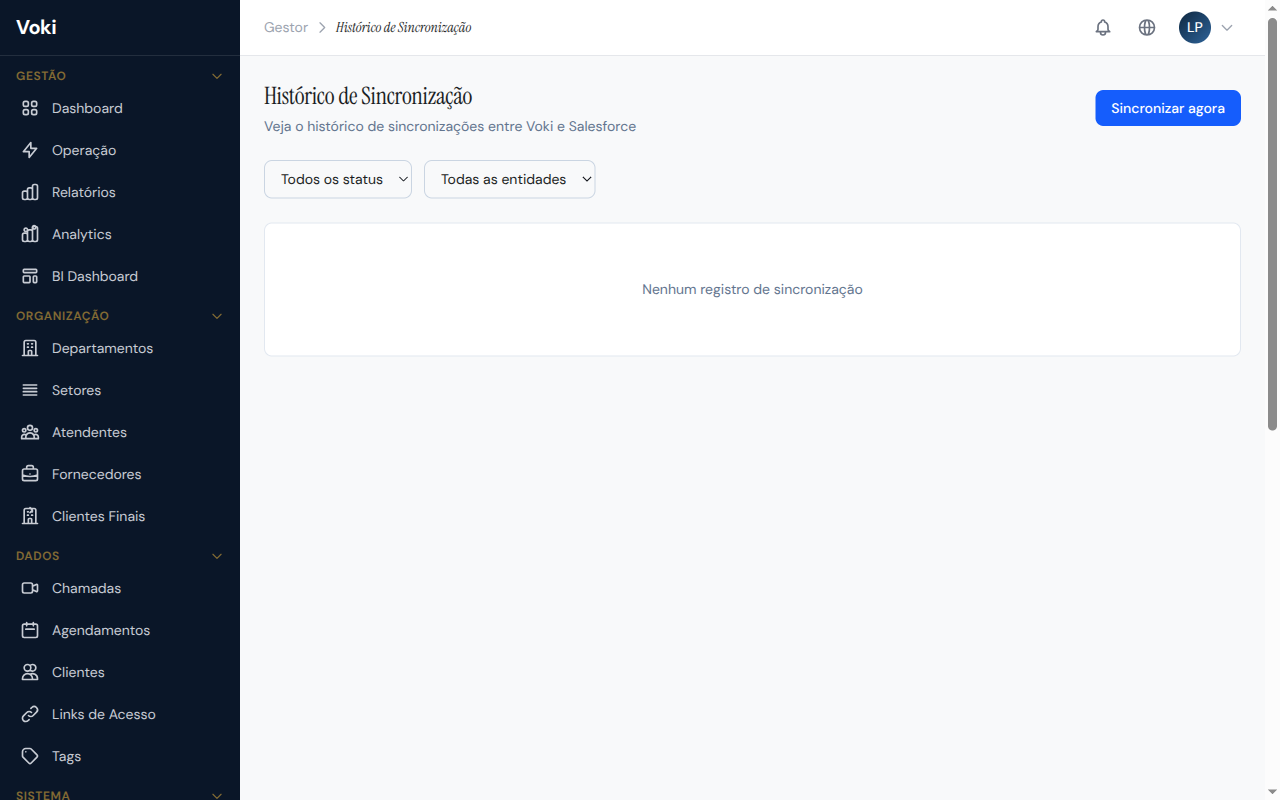
- Date/Time — when the synchronization occurred
- Type — automatic or manual
- Records — number of records synchronized
- Status — success, partial, or error
- Details — in case of error, a detailed description of the problem
Manual Synchronization
To force an immediate synchronization:
- Go to the "Synchronization" tab
- Click the "Sync Now" button
- Wait for completion — progress will be displayed in real time
Salesforce Rate Limits
Salesforce has daily request limits. Voki automatically respects these limits, queuing synchronizations when necessary. Avoid running manual synchronizations excessively.
Plans and Limits
Voki offers different plans to serve companies of all sizes. Each plan includes a specific set of features and limits.
| Plan | Attendants | Departments | Participants | Highlights |
|---|---|---|---|---|
| Free | 1 | 1 | 2 (P2P) | Ideal for testing and evaluation |
| Starter | 5 | 3 | 10 (SFU) | Recording, transcription |
| Business | 15 | 10 | 20 (SFU) | Analytics, CSV export |
| Professional | 50 | 25 | 50 (SFU) | BI Dashboard, SMS/WhatsApp |
| Enterprise | Unlimited | Unlimited | 100 (SFU) | PBX, Salesforce CRM, full API |
Need more?
If your current plan doesn't meet your operation's needs, contact the sales team to discuss an upgrade or a custom plan.
When a plan limit is reached, the system displays a friendly message with:
- A clear description of the limit reached
- A button to contact the sales team via WhatsApp
- A button to contact the sales team via email